Sometimes iTunes can be a chore, but here is some happy news for you. In macOS Catalina version, you no longer need to use iTunes to backup and restore your iPhone or iPad. Here’s how to Back Up and Restore Your iPhone or iPad without iTunes.

If you are running a previous version of macOS, you can also use a third-party app.
Backup and Restore in macOS Catalina and Newer
In macOS Catalina, iTunes has been disbanded into multiple apps such as Podcasts, TV, and Music. The responsibility of backing up and synchronising the iPhone and iPad goes to the Finder app.
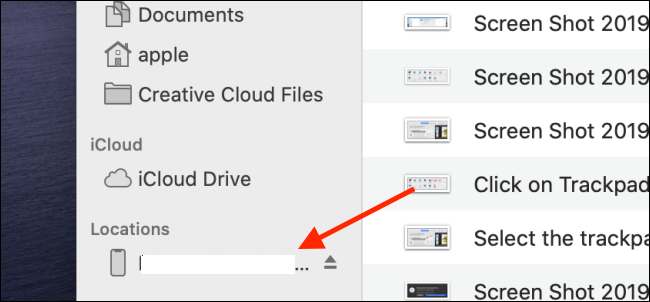
After connecting your iPhone or iPad to your Mac First, open the Finder app. There, you will see your iPhone or iPad in the “Locations” section. Select your device from the sidebar.
If this is the first time you are syncing your iPhone or iPad, you will be prompted to trust the device. If prompted, Tap on the “Trust” button on the Mac. Then, on your iPhone or iPad, Tap the “Trust” button from the prompt and then enter the device passcode.

Once authenticated, you will see the device management screen for your iPhone or iPad right in the Finder window. If you have used iTunes previously to sync your iOS or iPadOS device then, you will feel right at home.
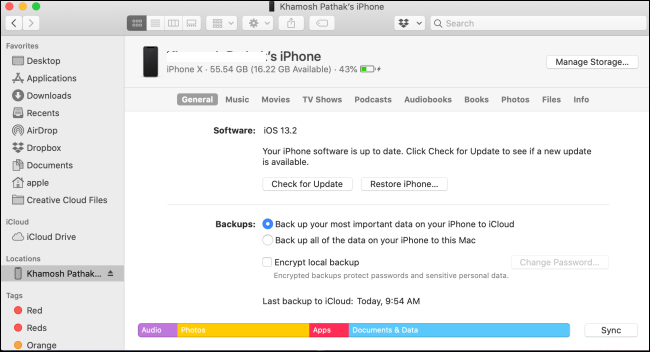
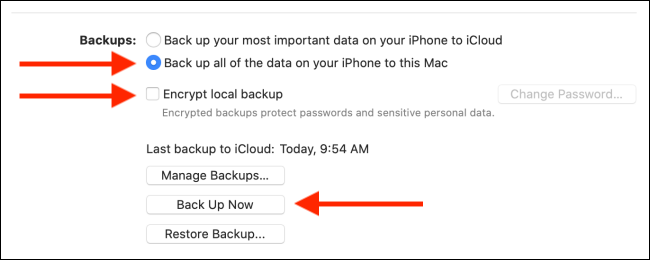
To back up your iPhone or iPad, go to the “Backups” section and then switch to the “Back Up All the Data on Your iPhone/iPad to This Mac” option.
Then, if needed, select the “Encrypt Local Backup” option. This will ensure all your private data—like health data, passwords, and more—is backed up as well.
If this is the first time you are doing this, you will be prompted to create a password, you can also add this password to your Keychain. Tap on the “Set Password” button to save the password.
Then Click on “Back Up Now” to start the backup process. The progress wheel next to the device name in the sidebar will start to spin.
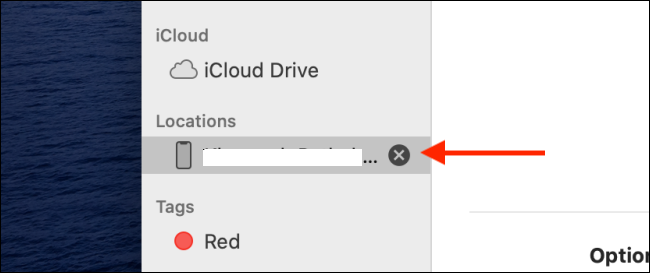
If at any point you want to stop the backup process, just hover over the spinning wheel next to the device name in the sidebar. It will then turn into an “X” icon. Then click on it to stop the sync process.
To confirm that the backup was genuinely completed, take a look at the “Last Backup to This Mac” section.
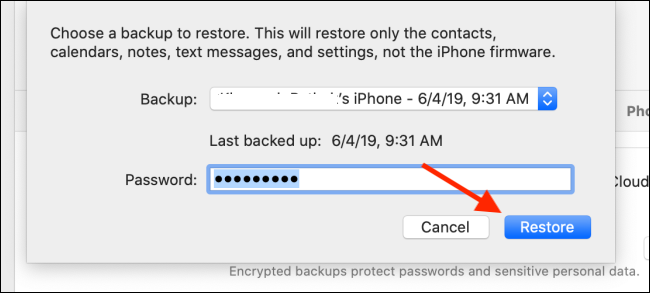
If you want to restore an old backup on the iPhone or iPad, just click on the “Restore Backup” button.

From the popup then select the backup and Tap on the “Restore” button to start the process.
To safely eject the iPhone or iPad after the backup or restore process, Tap on the “Eject” button next to the device name in the sidebar.
Alternatives for Previous macOS Versions
If you are not running macOS Catalina and you do not want to use iTunes to back up and restore your iPhone or iPad then you can use a third-party app. A couple of iOS device managers are also available out there like dr.fone.
We recommend you take a look at iMazing. This application is simple to use and comes features you will not find in Apple’s own backup tool.
By using iMazing, you can individually sync photos, apps, and other data. This is a two-way sync process, so you can just as easily export music, photos, or other data from an iPhone or iPad back to the Mac.
iMazing’s free version lets you also take unlimited backups for free. But to restore a backup, you will need to buy a license for $44.99. Download the iMazing app from the website, install it and open the app.
Connect your iPhone or iPad to the Mac using a cable and then click your device from the sidebar. From the menu, Tap on the “Back Up” button.
From the next screen, modify the settings and destination folder if needed. Here, Tap on the “Back Up” button.
After that, the backup process will begin. Once the backup finishes, you can easily go back to the main screen and individually sync photos or music.
To restore a backup, Tap on the “Restore a Backup” button to start the process. From the next screen, you will be able to choose a particular backup.