In Windows 10, you do not need any extra software to make automatic backups of your system’s settings and files, because that feature is already available. Today I will tell you to use automatic computer backup on Windows 10.
How To Take Automatic Computer Backup On Windows 10:
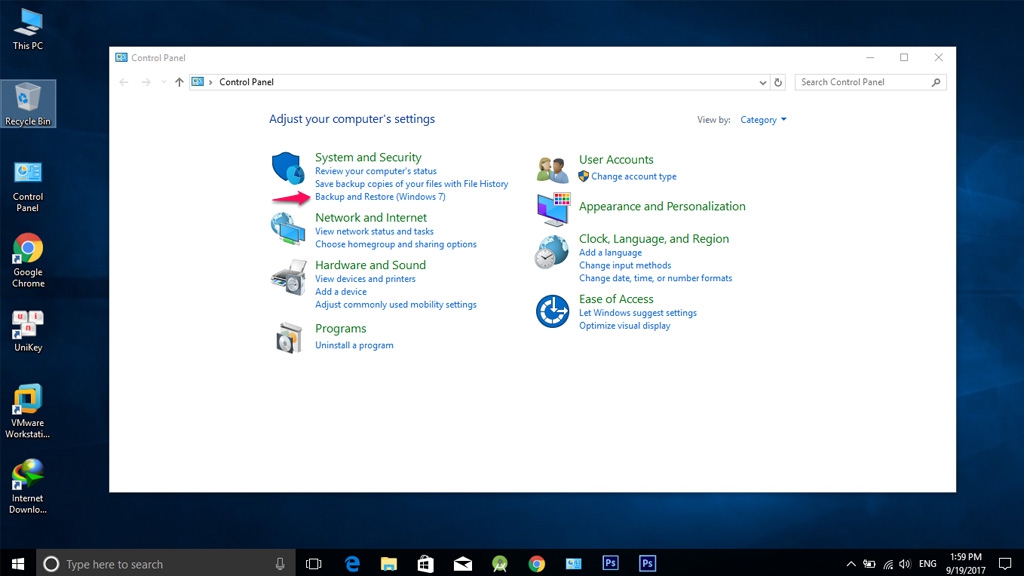
Step 1: Open the Control Panel
Step 2: Click Backup and Restore (Windows 7)
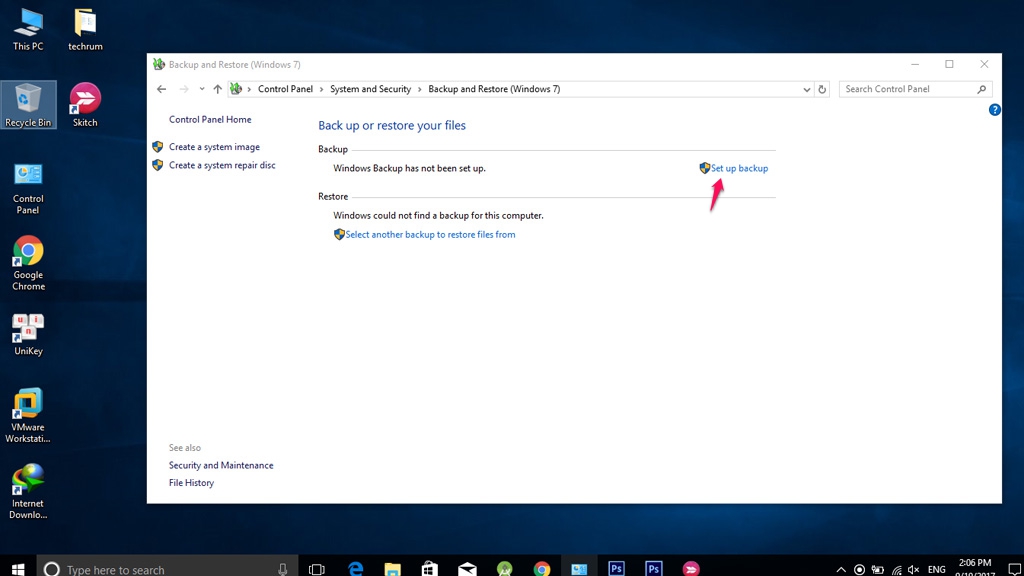
 Step 3: Click on System and Security, select Set up a backup as shown.
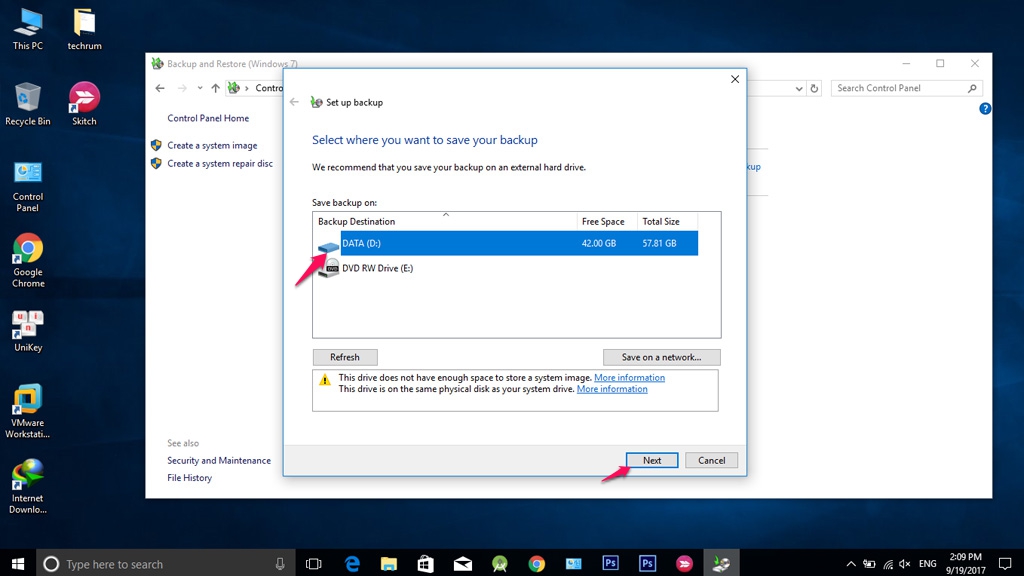
 Step 4: Select the external drive you want to use to store the backup.
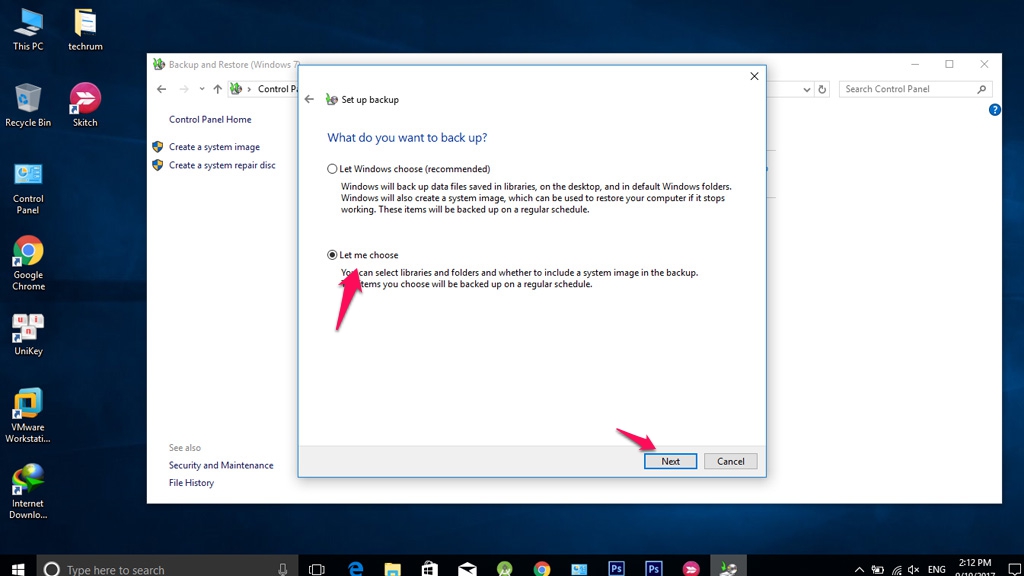
 Step 5: In the What do you want to backup? , Click Let me choose, to make sure everything is backed up.
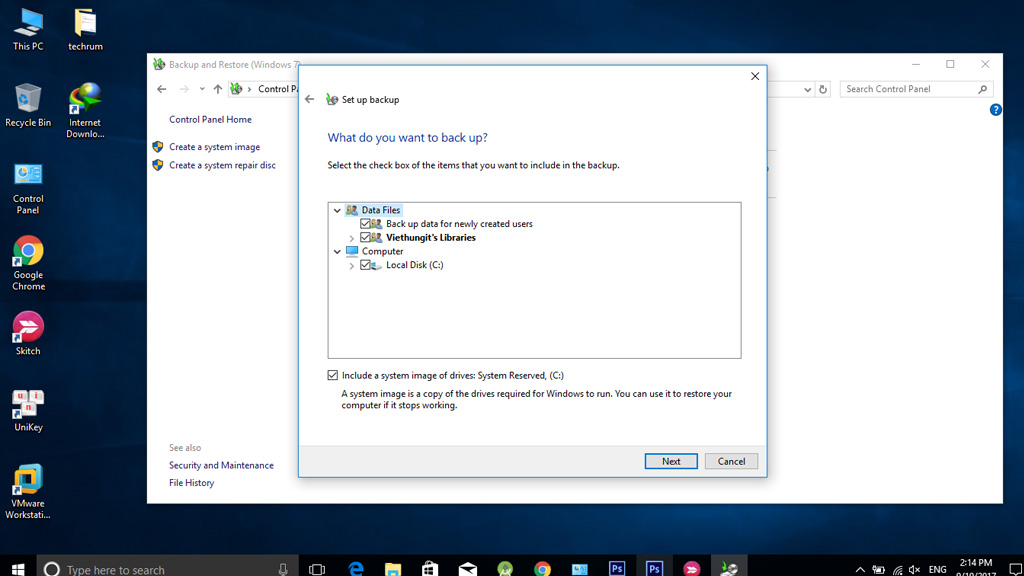
 Step 6: Check and tick the information you want to back up. You should select the full Data Files and Computer. Click the Include system of drives option: System Reserved, C:, then click Next.
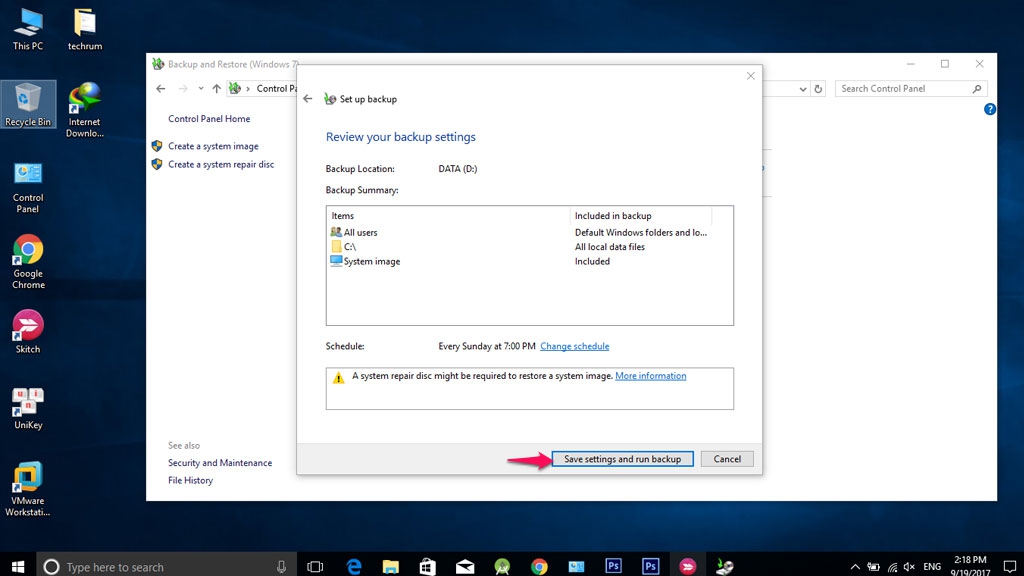
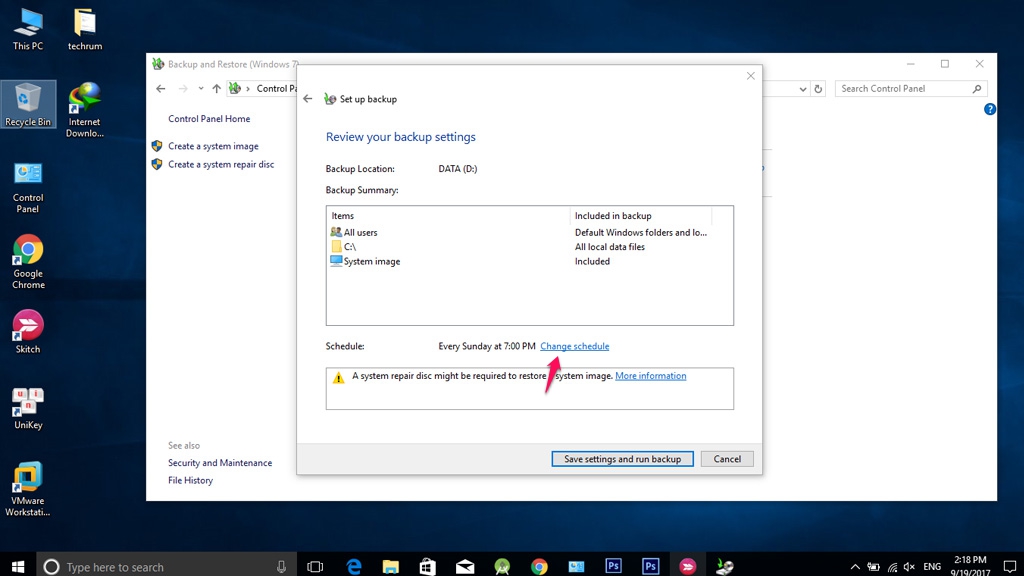
 Step 7: Check the information again, the Schedule is the time the system starts the automatic backup process. You can click Change schedule to change the time you want.
 Step 8: Click Save settings and exit to finish.