Tired of too many tabs cluttering up your Chrome browser? Google is working on a solution to help organize all the tabs you have open. The Tab Groups feature provides neat, colour-coded labelling for all your tabs. Here’s how to enable and use tab groups in Google Chrome Browser.
Kindly Note: This feature is behind an experimental flag, that means Google’s developers are still working on it. Like Google Chrome’s Clipboard sharing feature, it may be a bit buggy, or else it may change dramatically in the future. It may even be removed in a future update.
How to Enable Group Tabs in Chrome
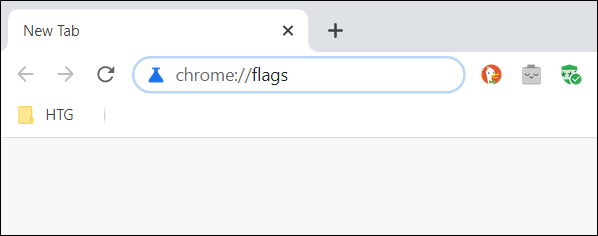
Step 1: First of all, open a new Chrome browser tab. Then, type the following into its Omnibox (address bar) and then press the Enter key:
chrome://flags
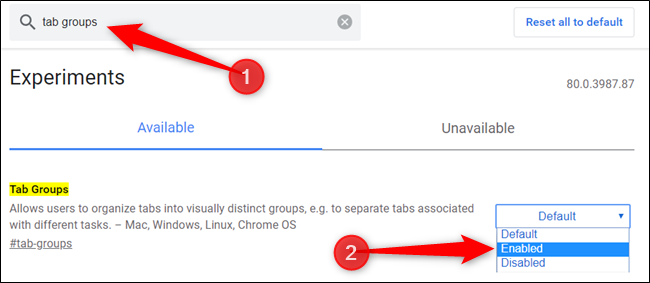
Step 2: Then in the search bar at the top of the page, type “Tab Groups” and select “Enabled” from the dropdown menu next to the flag.
Step 3: After that tap on the “Relaunch Now” button to restart Chrome and apply the experimental flag that’s been enabled. Make sure to save any work in any open tabs. Google Chrome will reopen any tabs you had open, but text typed into fields on the page may vanish.

How to Use Tab Groups in Chrome
As soon as Google Chrome relaunches, you will not notice anything different at first. In order to use the tab grouping feature, you will need to open a few tabs to use it to its full extent.
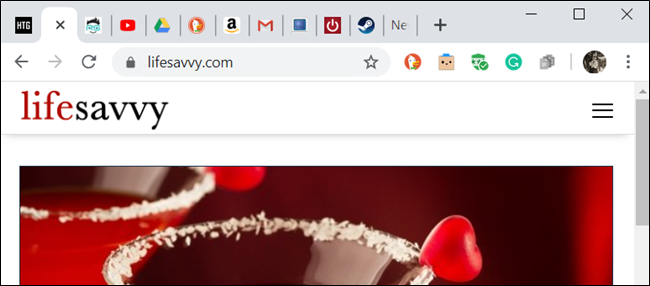
After that open a few of your favourite web pages to start grouping your tabs.
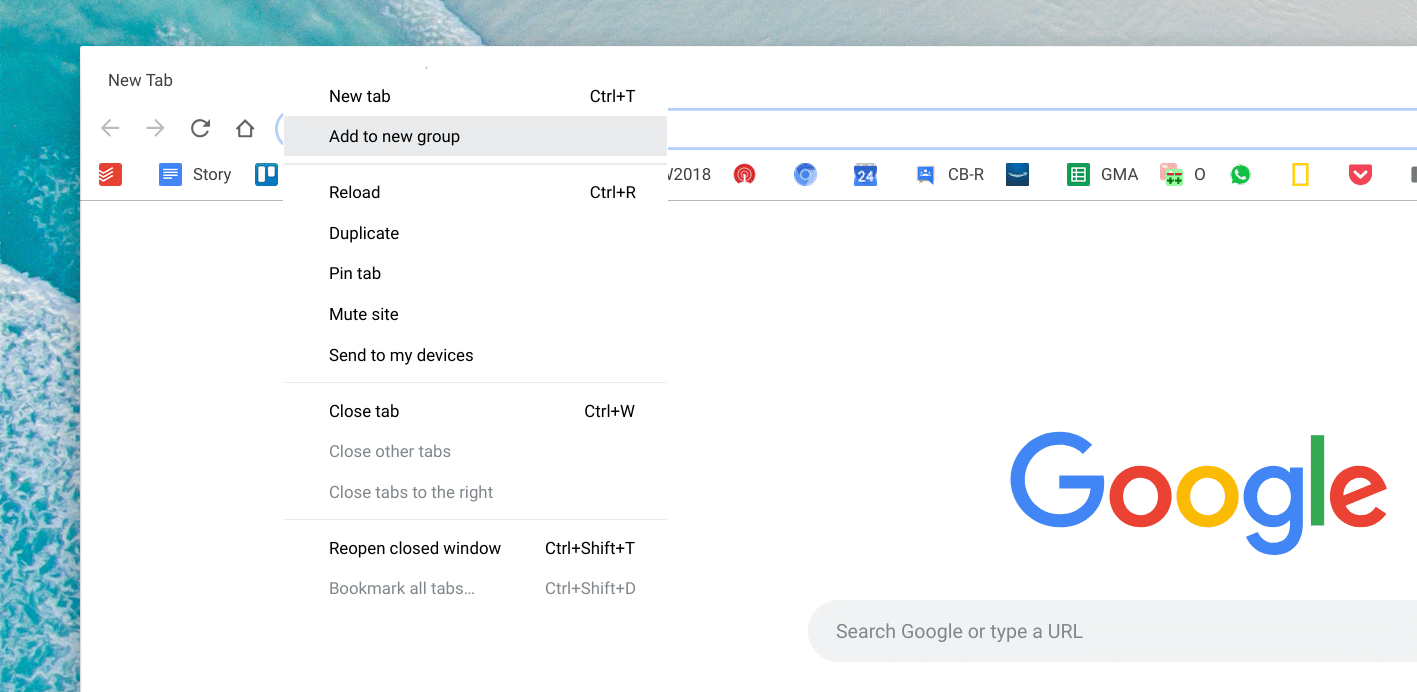
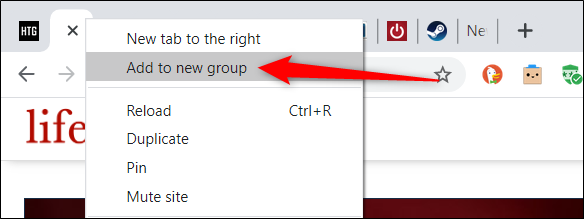
Now, right-click on a tab and choose “Add To New Group” from the context menu.
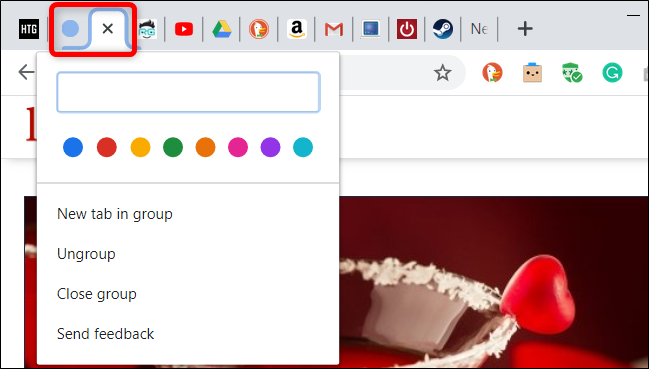
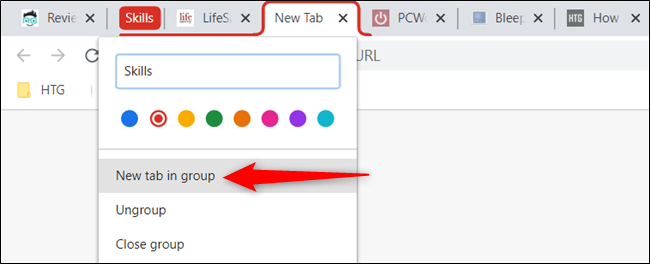
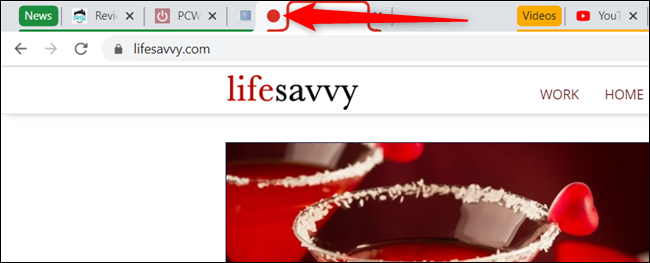
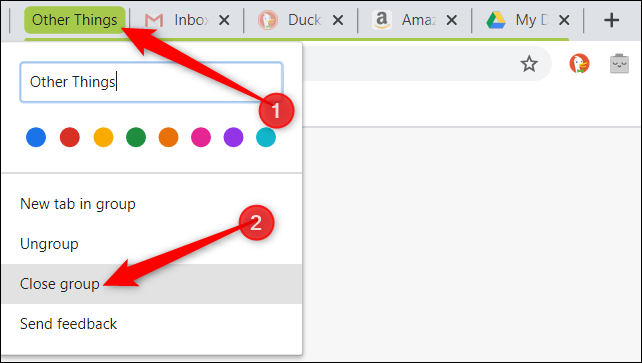
Next, a coloured circle will appear to the tab, and when you tap either the tab or the circle, the tab group menu will show. Here you can name the group, change the colour-coding, add a New Tab into the group, ungroup all tabs in the group, or close all the tabs that are in the group.
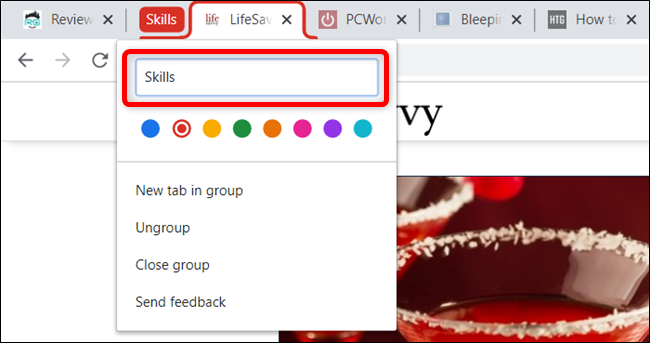
When you give the group a name, the circle will disappear and will be replaced by the label you gave it.
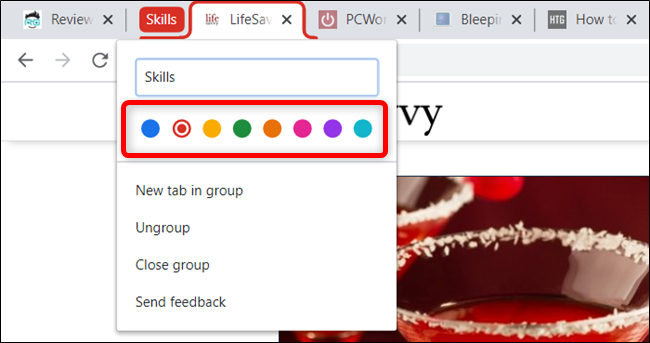
To give your tab groups more personality, you can select one of the eight colours available. This also helps a bit in distinguishing between groups in case you do not want to give them a name.
To add a New Tab page inside an existing group, simply tap on New Tab In Group. It will appear alongside anything already in the group.
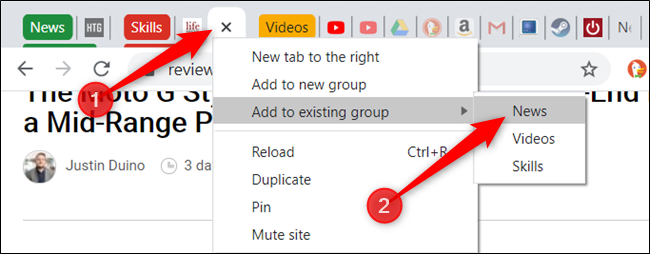
To add tabs to an already existing group, first right-click a tab. After that tap on “Add To Existing Group,” and then select the group you want to add it to.
Alternatively, drag a tab over into the existing tab group until the colour encapsulates it and then let it go. The tab will now be a part of the grouping.

In case you do not like the order in which the groups are organized then, it is easy enough to re-arrange them. Then drag the label/coloured circle around the tab bar until you are happy with its location.
If you no longer want a specific tab in a group then, you can remove it. Simply right-click on the tab and choose Remove from the group. You can also drag the tab from the group and place it in an empty section.

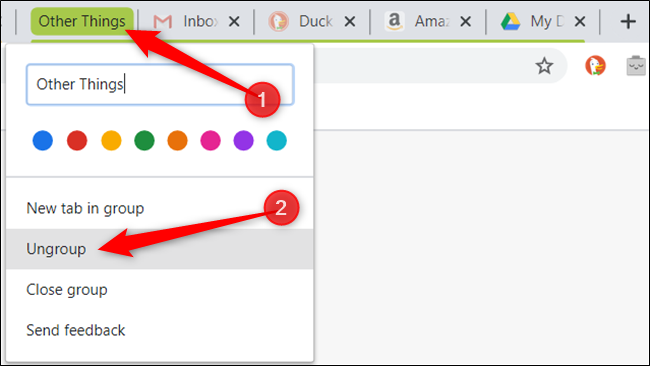
However, if you want to disband the group altogether then, you can ungroup anything just as quickly as you created it. After that tap on the group name and then click “Ungroup.”
In case you are done with everything inside the group then, you can close all the tabs at once. It will destroy the group and everything in it. First, click on the designated group name and then tap on “Close Group” in the menu.
Although Google Chrome’s tab grouping feature is missing a few things. Like the ability to merge group. The Tab Groups flag is a great way to organize, group, and label all the tabs you have open in your browser.
