Ads on Website are the major source of income for web browsers. However, many times seeing too many ads on a single webpage degrades the overall experience for the website especially with popup ads or click ads. Here’s how to Enable Built-in Adblocker in Google Chrome Browser.

Thankfully, Google Chrome Browser has built an ad blocker right into the browser that helps users block ads from a particular website. However, still, the built-in ad blocker is not as efficient as some of the ad blocker plugins.
But it can block video ads, malicious ads with malware, scams and stop advertisers from accessing your personal data. So, in case you don’t want to download any random ad blocker on your Chrome browsers then, here’s how you can enable or disable the built-in Chrome’s adblocker.
Pre-requisites:
1. The latest version of Google Chrome browser
2. Working internet connectivity
3. Windows PC, Mac, Android or iOS device
Steps To Enable Built-in Adblocker in Google Chrome Browser
Step 1: First of all, open any website for which you want to block the ads.
Step 2: Then click on the padlock icon beside the URL bar and choose the option – Site settings.
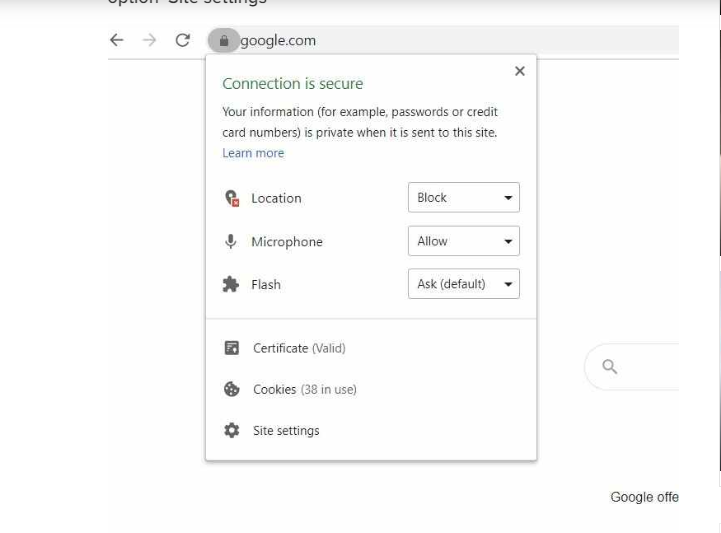
Step 3: Now under the Site settings page, scroll down look for the option – Ads.
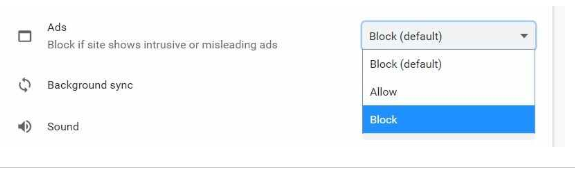
Step 4: After that, tap on the box placed in front of that and choose the option ‘Block’ to filter ads from that website.
Step 5: At final, reload the webpage and you’ll encounter fewer ads going forward.
Kindly note: Sometimes, the browser set the Block option by default, in that case, you can either leave the option as it is. Or else you can simply select Block option from the drop-down menu.