A driver is a software that communicates between the hardware components of a computer and its OS making them work together. Many unexplained computer problems can be narrowed down to issues with the drivers. Here’s how to find & replace outdated Windows Drivers.

Issues with the driver could be due to anything from your printer malfunctioning or your game crashing. There are numerous drivers available for the video card, audio, motherboard and much more.
It is not necessary to update your drivers if your computer is working fine but if it looks like you do need to update your drivers. Just a few ways in which you can update your drivers have been listed below.
How To Find & Replace Outdated Windows Drivers :
1. Check your drivers
First of all, check your drivers. Sometimes, you might not know which drivers and what version of drivers you might have installed on your system.
You can find this information in Windows XP to Windows 8 by simply using Command Prompt. You can access Command Prompt by simultaneously pressing Windows Key + X. Then type driver query and hit Enter. This will give you a list of all the drivers, present on your system and when it was published.
Or else you can also type driver query > driver.txt to get a text file which will save into wherever your command prompt is set to. The date listed is not the date your driver was updated on. It was the date on which the driver was published.
It means that even if the date is a few years back, the driver does not need updating. However, this method does not work for Windows 10 properly. The free utility DriverView is a good option to get all the information you need.
Information such as version number, manufacturer, installation date and more will be made available. You can also double click on a driver on the list to see information in a single view.
2. Update drivers directly from Microsoft
The Windows Update option will directly take care of your drivers when it gets updated. In order to perform a Windows Update, simply press Windows key + I to open Settings. Then go to Update & Security > Windows Update > Check for updates.
You can also disable automatic updates if you want to. Simply perform a search for device installation settings and then select the relevant result
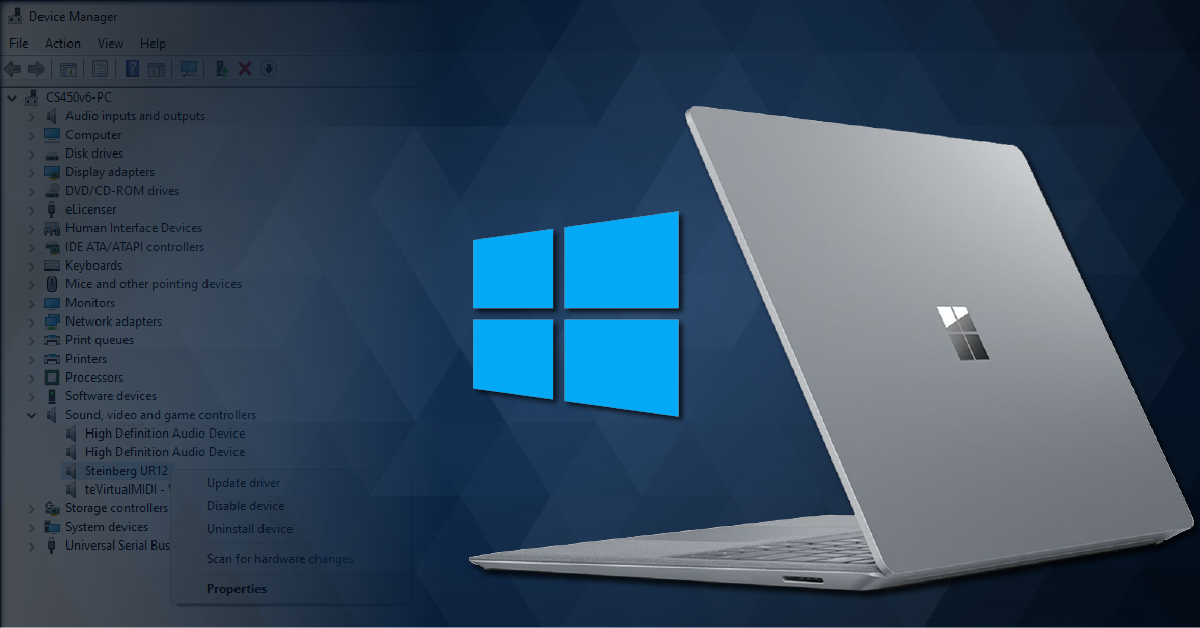
3. Update drivers via Device Manager

You can open Device Manager by pressing Windows key + X and clicking on Decide Manager. The Device Manager will show all your system components, like your disk drives, display adapters, processors and many more. Just double-clicking on a category will show you the devices within.
Now click on Update Driver and then select Search automatically for updated driver software and this will find a driver online for you. You can also click ‘Browse my computer for driver software’ option to manually update the drivers.
4. Update drivers manually from the manufacturer
You can update your drivers by going directly to the source and updating the drivers from the manufacturers. You just have to use the information you got through the driver query command. The DriverView utility or Device Manager will figure out which drivers you have and the manufacturers of the drivers.
You can directly head over to the manufacturer’s website and look in the driver’s section for the right one. Some manufacturers like AMD and NVIDIA scans your system and detects the drivers you need automatically.