Generally, Windows 10 automatically connects to your default Wi-Fi network when you turn on your computer or laptop. However many times, Windows 10 might not automatically connect to your Wi-Fi network due to some reasons. Here’s how to fix Windows 10 automatic connection failure to Wi-Fi.

There are many ways in which you can Fix Windows 10 Automatic Connection Failure to Wi-Fi
Check whether the Wi-Fi adapter is ON or OFF :
There is an automatic action of turning off the Wi-Fi adapter when Windows 10 is idle for some time. This prevents Windows 10 from automatically connecting to Wi-Fi network upon turning on the PC. Here’s how to fix it:
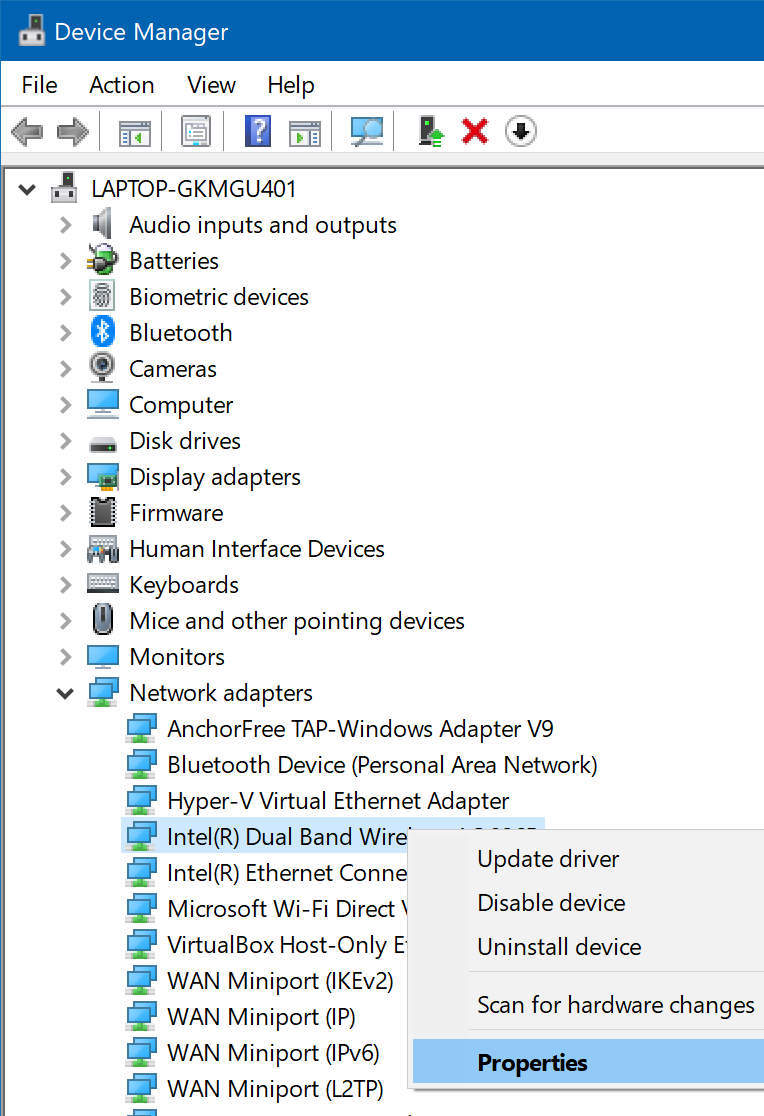
Step 1: Right-click on the Start button on the taskbar and then Tap on the ‘Device Manager’ option to open the Device Manager window.
Step 2: There Expand the Network adapters tree. After that right-click on your Wi-Fi adapter’s entry and then click Properties. The adapter’s entry generally includes Wireless Adapter or Wireless AC in its name. If you are having trouble in finding out which is your Wi-Fi adapter. Then you have to refer your computer’s manual or specs sheet.
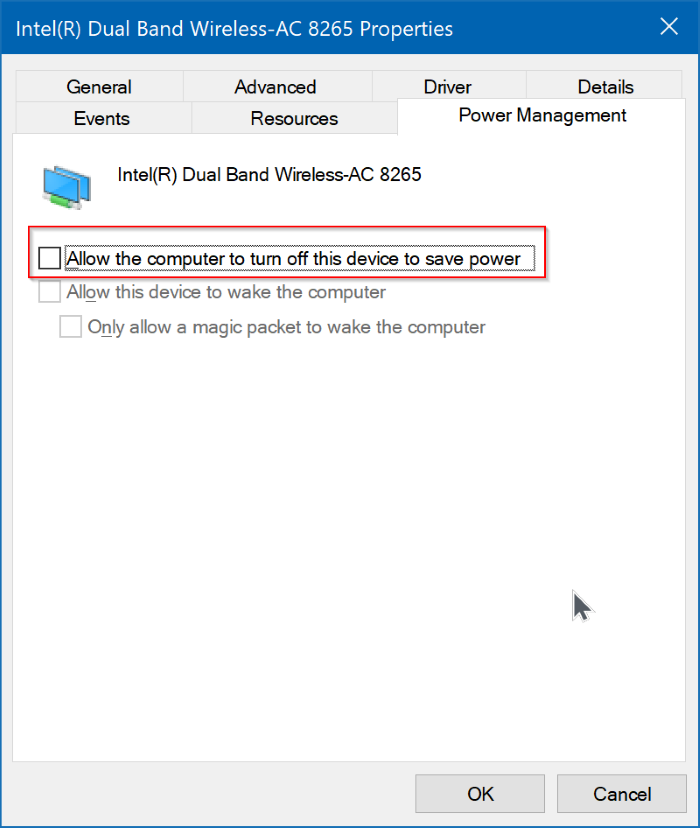
Step 3: Switch to the Power Management tab. Then, Deselect the Allow the computer to turn off this device to save power option. Then, click the OK button.
Now Restart your computer.
Disable Microsoft Wi-Fi Direct Virtual Adapter
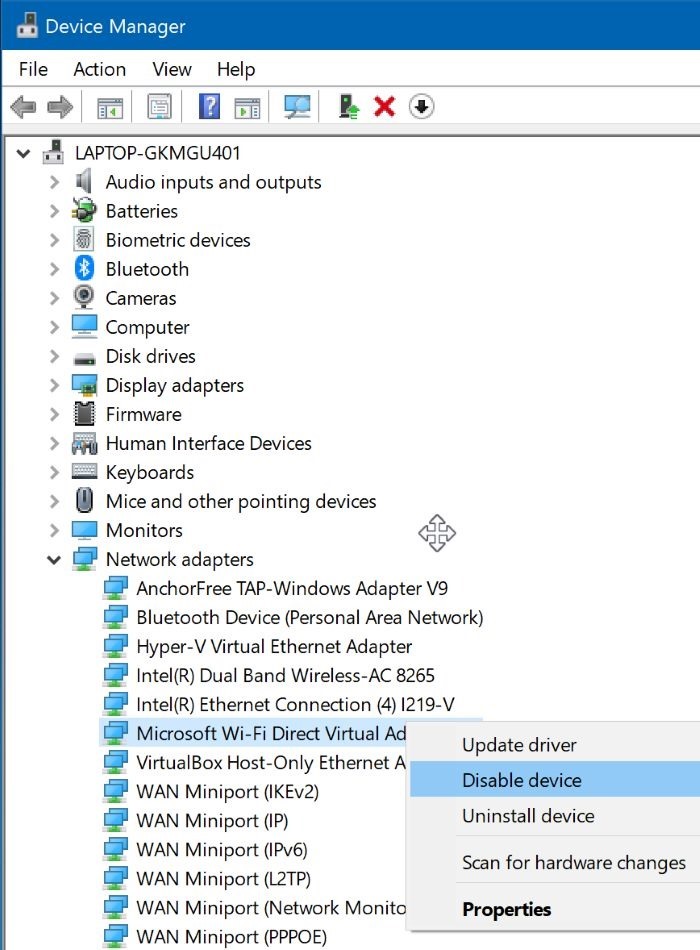
Step 1: Open the Device Manager. Then, Expand the Network tree.
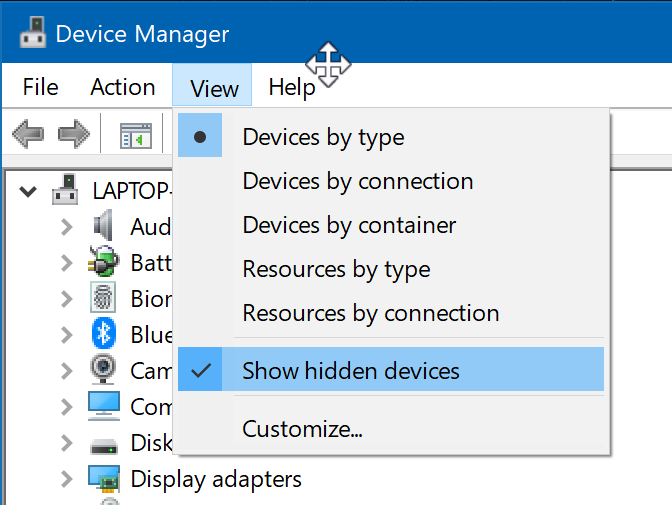
Step 2: Go to the Microsoft Wi-Fi Direct Virtual Adapter entry. If you cannot see one then, click the View menu and that select the Show hidden devices option to see the Microsoft Wi-Fi Direct Virtual Adapter entry.
Step 3: Right-click on the Microsoft Wi-Fi Direct Virtual Adapter entry and Tap on the Disable option. In case you have multiple Microsoft Wi-Fi Direct Virtual Adapter entries then please right-click on all of them and then click on the Disable option.
After all, Restart your computer once.
Reinstall the Wi-Fi driver
If the above two solutions fail to fix the issue, reinstalling the Wi-Fi driver should fix the issue. Go through our how to reinstall the Wi-Fi driver in Windows 10 guide for step-by-step directions.
First of all, Forget and then add the Wi-Fi network. Forgetting and then adding the Wi-Fi network again may fix the issue for many users. Here is how to do that.
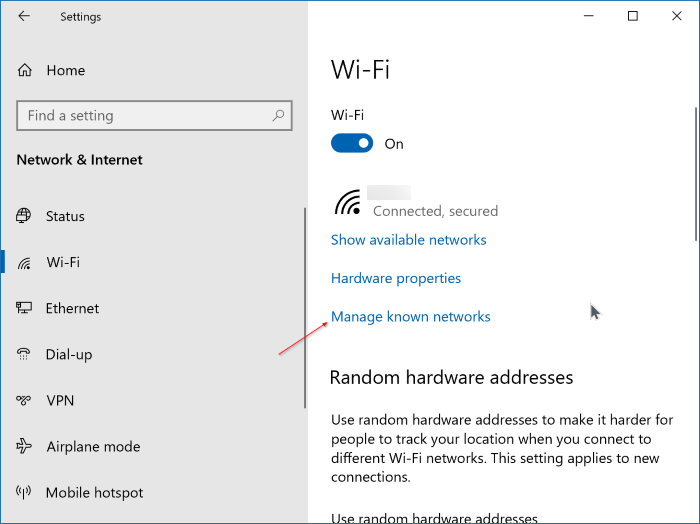
Step 1: Go to Settings > Network & Internet > Wi-Fi.Then, click the Manage known networks link to view all the Wi-Fi network profiles saved on your PC.
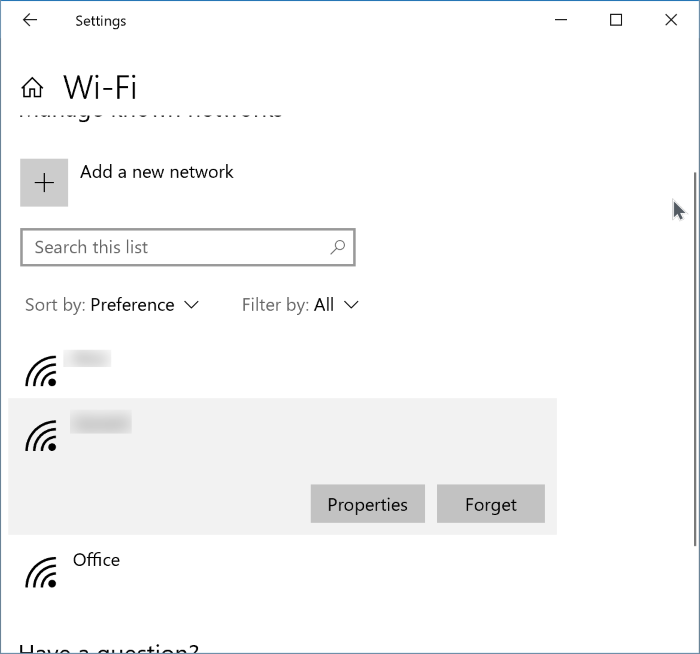
Step 2: Choose a Wi-Fi network by clicking on it to see the hidden Forget button. After that click the Forget button to delete the Wi-Fi profile from your PC.
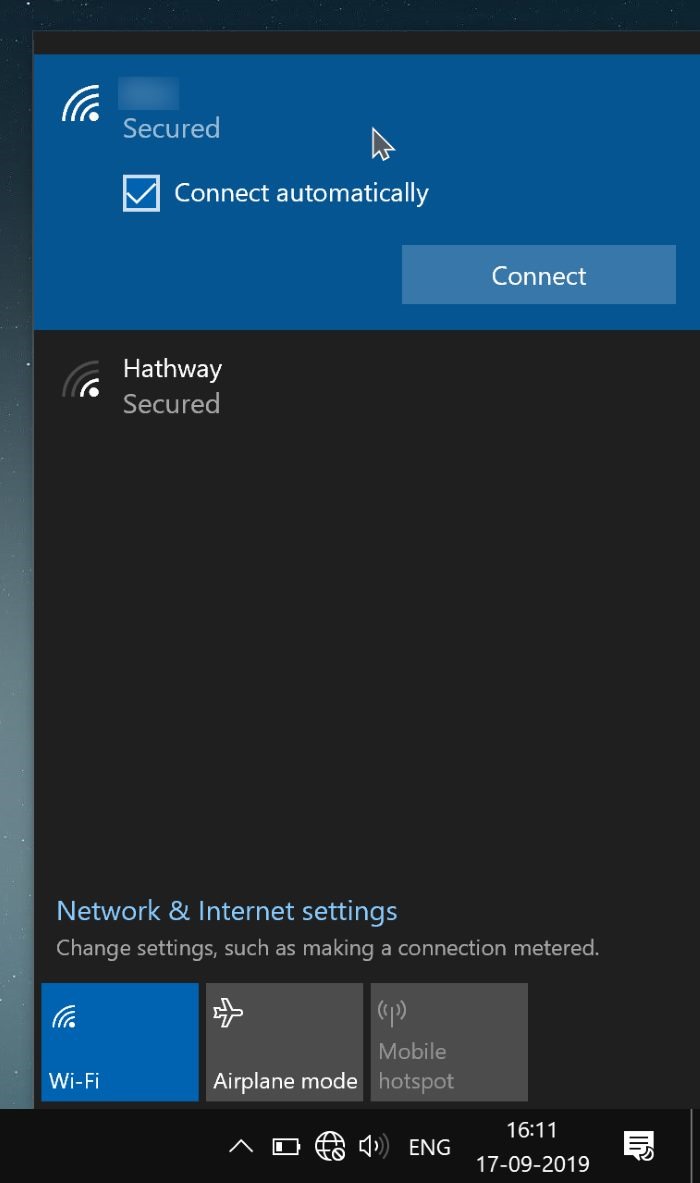
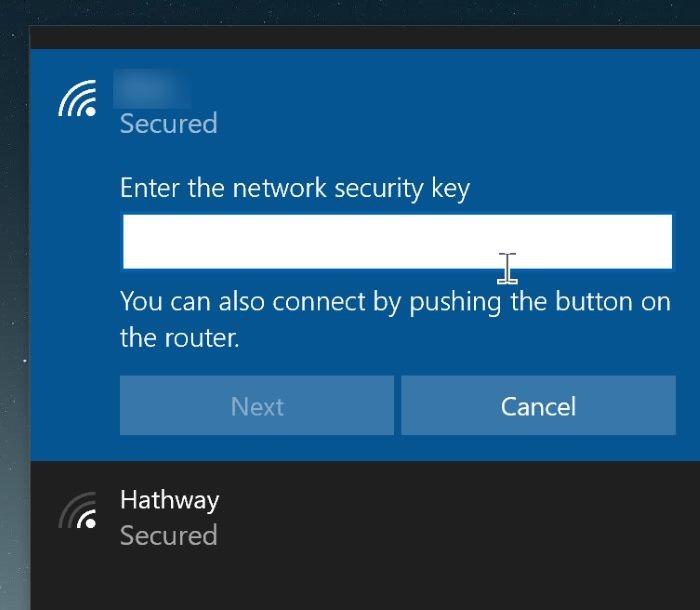
Step 3: Tap on the Wi-Fi/network icon on the taskbar. Now click on the Wi-Fi network that you want to automatically connect to, select Automatically connect option. Then click the Connect button and type the Wi-Fi password when you are asked to do so.