Windows 10 has a secret function that allows you to right-click a file and either move or copy it to a specific location of your choosing. This little registry hack will help you with copying and moving your files with ease. Here’s How to Add “Move to” or “Copy to” to Windows 10’s Context Menu.

We have to preface this with a standard warning, though. The Registry Editor is a powerful tool and if you misuse it, it can render your system unstable or even inoperable. This is a quite simple hack, though. As long as you stick to the instructions, you will not face any problems.
In case you have never worked with the Registry Editor before, however, you might want to read up on it a bit before you get started. And definitely back up the Registry and also your computer before you make the following changes.
If you want to be extra safe then, you can also create a System Restore point before you continue. In that way, if something does go wrong then, you can just roll back to before things went haywire.
Add “Move to” to the Context Menu
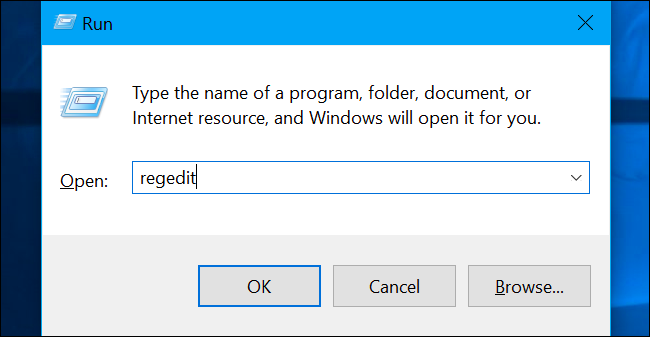
In order to add “Move to” to the context menu, the first thing you have to do is open the Registry Editor. To do so simply press Windows+R, type “Regedit” in the text box, and then press Enter.

Now navigate to the following key in the left sidebar or you can paste it directly into the address bar:
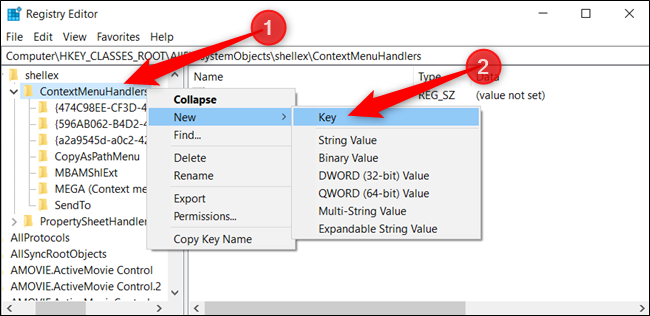
Once you are there, right-click “ContextMenuHandlers,” and then select New > Key from the pop-up menu.

Then name the new key “Move to,” and then press Enter.
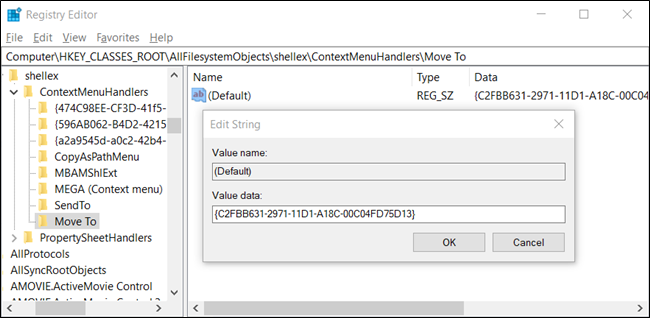
Here, double-click “(Default),” paste the following string into the “Value Data” field, and then press Enter:
{C2FBB631-2971-11D1-A18C-00C04FD75D13}
Now you can now safely close the Registry Editor. You do not have to restart or sign out to start using this functionality.
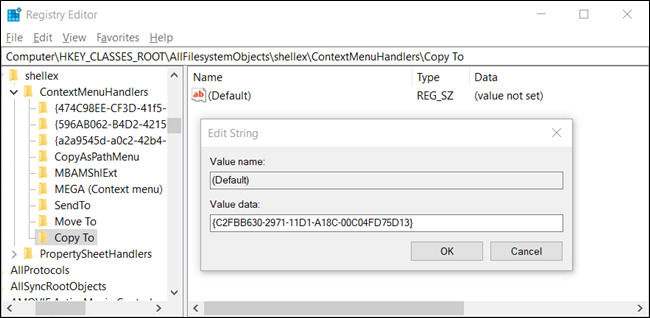
Add “Copy to” to the Context Menu
Do the same as before, to add “Copy to” to the context menu first, open the Registry Editor. Then press Windows+R, type “Regedit” in the text box, and then press Enter.
Now navigate to the following key in the left sidebar or paste it directly into the address bar:
HKEY_CLASSES_ROOT\AllFilesystemObjects\shellex\ContextMenuHandlers
Once you are there, right-click “ContextMenuHandlers” and select New > Key from the pop-up menu.
Then name the new key “Copy to” and press Enter.
Here, double-click “(Default),” paste the following string into the “Value data” field, and then press Enter:
{C2FBB631-2971-11D1-A18C-00C04FD75D13}
When you are done, you can safely close Registry Editor. Again, you do not have to restart or sign out to start using this functionality.
Now download Our One-Click Registry Hack
In case you will rather not edit the registry yourself then, you can download our Add Move to/Copy to registry hack. Simply open the ZIP file, double-click either “AddMoveTo.reg” or “AddCopyTo.reg.” Then tap on “Yes” to add the information to your registry.
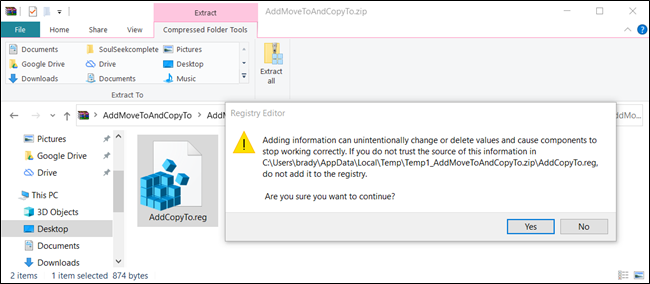
These REG files add the same registry settings which we covered above. In case you would like to see what this or any other REG file will do before you run it, right-click the file, and then select “Edit” to open it in Notepad.
You can also easily make your own Registry hacks.
Using “Move to” or “Copy to” From the Context Menu
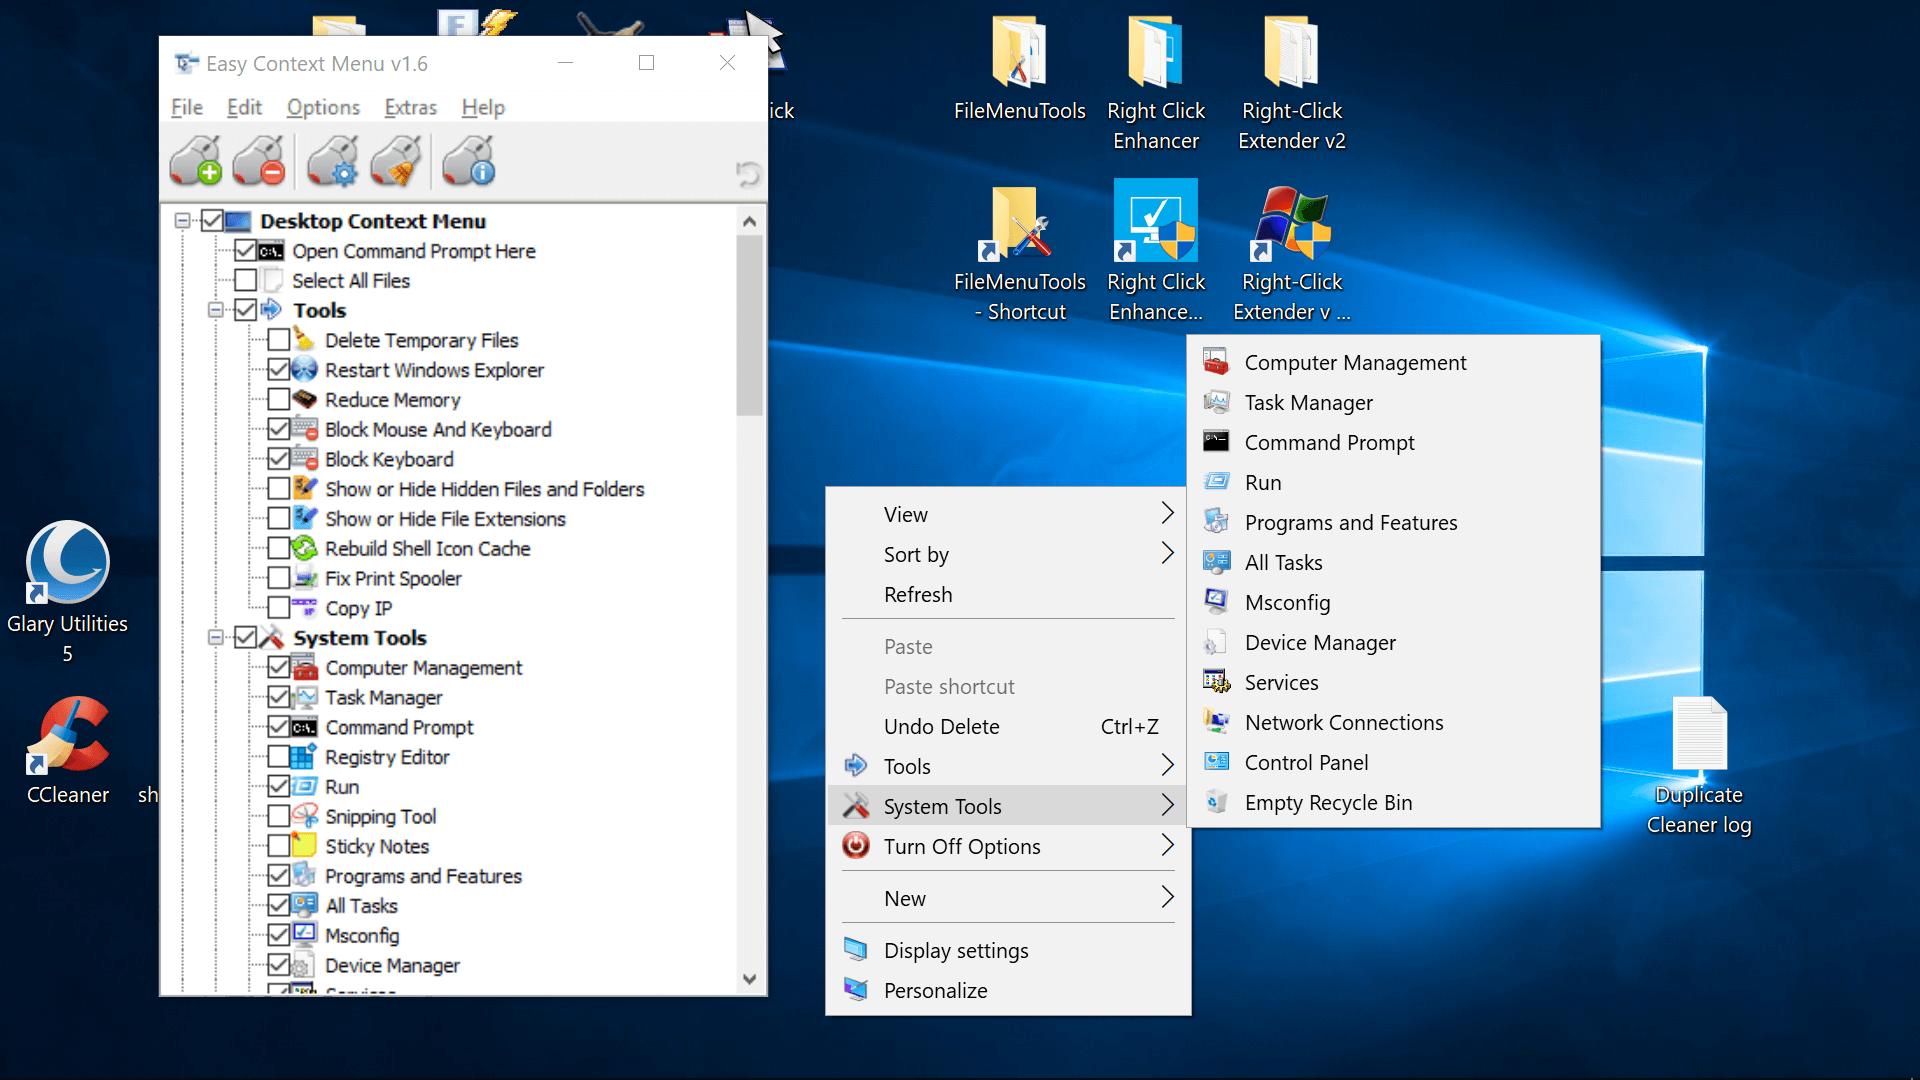
After adding these tweaks to the Windows registry and you right-click a file or folder, the context menu will appear as usual. However, it will now also contain the “Move to” and/or “Copy to” options.
Then a little dialogue will pop up so you can choose a destination folder. After you do, simply tap on “Copy” to send that file to the folder you specified.