It is really harder to create screen recordings in Google Slides presentations directly as a web-based service. You will have to record your screen using Screencastify for Chrome browser and save it to Google Drive. Here’s how to Add Screen Recordings to Google Slides.
First, you will need to download and install the Screencastify extension for Google Chrome before you begin. As Screencastify saves screen recordings to Google Drive then, you will also need to sign in to the same Google account you use for Google Slides.
Google Chrome and the Screencastify extension will need permission to use your microphone and camera, depending on whether you want to record these. The Screencastify extension will also ask you for permission during the initial setup process.
Creating a Screen Recording Using Screencastify
The advantage of using Screencastify for your screen recording is that it saves your videos to Google Drive, where you can then easily import them into Google Slides.
Screencastify extension will also allow webcam and microphone recording on top. It will allow you to record an action with an audio track and visual demonstration.
Until you decide to upgrade, Screencastisfy restricts screen recording to five minutes. In case your recording needs to be longer then, you have to upgrade. If that’s a problem, you’ll need to record your desktop using some other methods and upload the video to Google Drive manually.
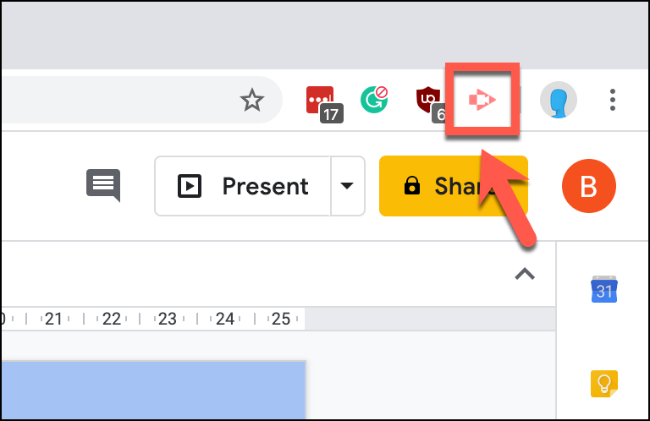
In case your recording is scheduled to be under five minutes long or you’ve upgraded then, Tap on the Screencastify icon in Chrome, next to the address bar in the top-right.
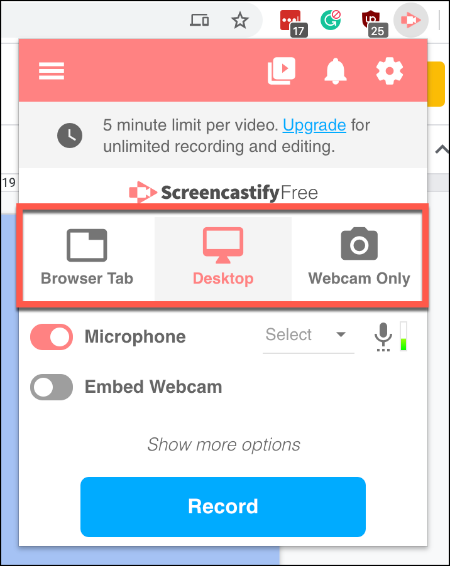
This will load the Screencastify menu. From there, you can choose to record your browser tab, your entire desktop screen, or your webcam only.
Tap on your preferred recording option to select it.
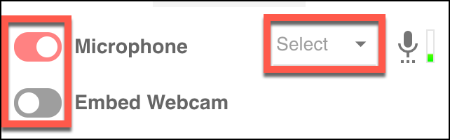
Before you start recording, you can also simply enable or disable the recording of your microphone and webcam. In case you choose to disable these options then, you won’t be able to record an audio track alongside the video. Also, you won’t be visible in the recording itself.
Tap on the slider next to the “Microphone” and “Embed Webcam” options to enable or disable them. When the slider turns pink, the option is enabled.
You’ll also need to select the mic you want to use from the drop-down menu next to the “Microphone” option.
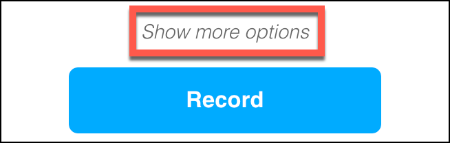
Tap on the “Show More Options” link, located above the “Record” button, to access additional options for your screen recording. These options will differ, depending on whether you’re recording your browser tab, screen, or webcam.
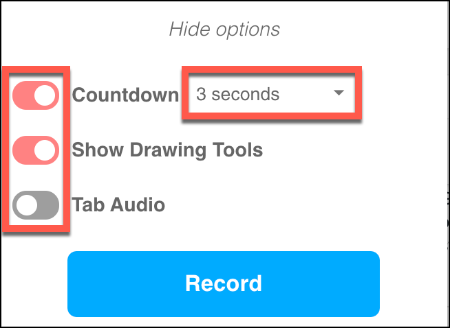
You can simply set a countdown before recording starts for each recording method. For the browser tab and desktop screen recording. You can also enable access to drawing tools, letting you draw on your screen as the extension records.
Recording the audio from your browser is only an option for browser tab screen recording.
Then by using your mouse, tap on the sliders to enable or disable these options. You can just set the countdown timer using the drop-down menu.
After that press the “Record” button to begin your screen recording once you’ve configured your settings.
Editing and Viewing Your Screencastify Screen Recording
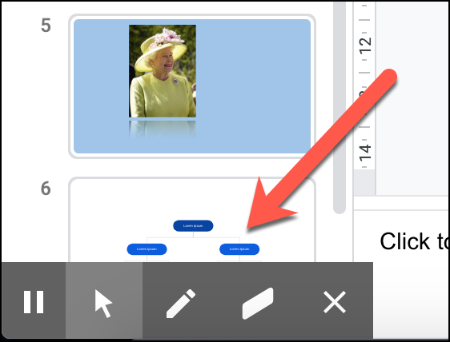
A tools menu will appear in the bottom-left of your screen when you begin recording depending on whether you have enabled the “Show Drawing Tools” option. You can also use this menu to switch between various drawing tools.
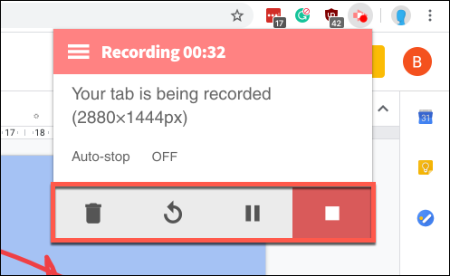
Pressing the Screencastify icon during a recording will bring up the recording controls. You can simply pause, stop, and delete a recording from this area. As well as view the current runtime.
After the recording is complete, the Screencastify recording will appear automatically in a new Chrome tab.
From there, you can view, download, or export your screen recording, or open the Screencastify editor. The video can be also accessible from your Google Drive storage at this point.
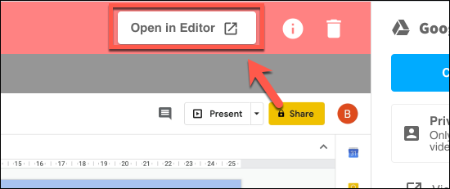
Then Press the “Open In Editor” button to edit your video in the Screencastify editor.
In case you don’t want to edit the video then, select “More Options”. Tap on the “View On Drive” button to view the video in your Google Drive storage.
You can also tap on the “Copy Shareable Link” to copy the URL to your video to your clipboard.
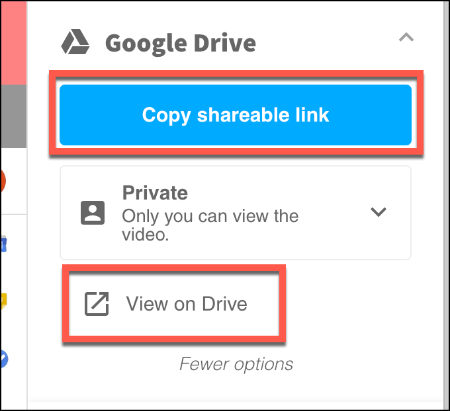
By default, only you will be able to view this video. However, you can change the privacy options for your video in the drop-down menu underneath the “Copy Shareable Link” button.
Importing Screen Recordings from Google Drive
Usually, Google Slides allows you to import videos from Google Drive directly. So open your Google Slides presentation as soon as you’re ready to import your screen recording.
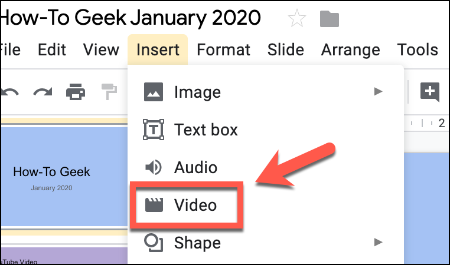
Then select or create a new slide to place your video in. After that press Insert > Video.
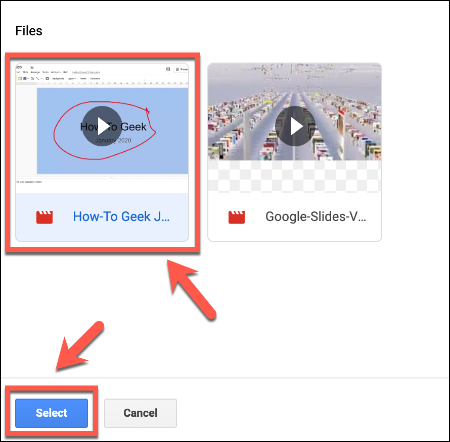
Press on the “Google Drive” option in the “Insert Video” selection menu. From here, simply locate your screen recording video.
Tap on the screen recording video. Then press the “Select” button to import it into your Google Slides presentation.
The screen recording will appear like an object on your slide, where you can resize it and move it to an appropriate position. Pressing the circular play button will begin playback. This will allow you to use your screen recording video as a helpful addition to your overall presentation.
You can also set your video to play automatically by right-clicking the video and then selecting the “Format Options” menu option. From here, Tap on “Video Playback” in the right-hand menu that appears.
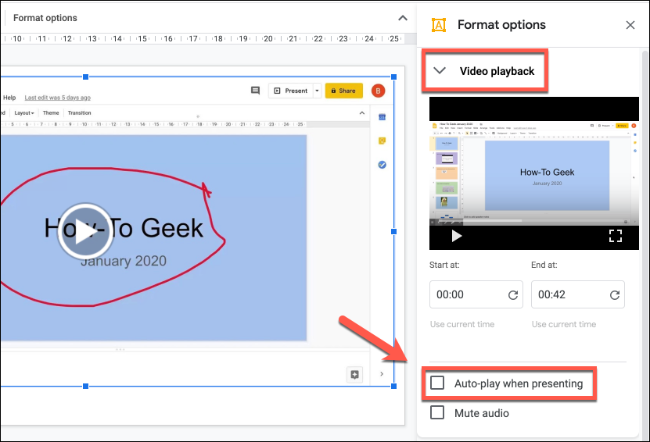
After this tap on the “Auto-play when presenting” checkbox to have your video begin playback automatically when you reach the slide containing it during your presentation.