You can easily back up your USB drive by creating a saved image. After that, you can take that saved image and clone multiple USB sticks. In this post, we are going to show you how to create an image of your USB drive using Windows 10.

Copy Vs Clone
Kindly do not follow this guide in case you are simply copying files from a USB stick. Basically, take the usual drag-and-drop method in File Explorer to transfer files to and from the USB stick.
This post usually targets users who need to fully back up or clone a USB stick, such as a USB boot drive. The simple difference here is that you simply cannot drag-and-drop its contents to another USB drive.
You simply need the drive’s master boot record and also partition tables. Even if the source USB drive is not bootable, you still need to make a clone if it has more than one partition.
The resulting image, then, consists of all visible and hidden files and the drive’s unused space too. The image includes slack space too: Unused remnants of drive space Windows 10 allocates to a single file.
Lastly, in case you need to copy files from a single non-bootable USB drive to multiple units with an identical capacity, cloning may be your quickest solution. Scenarios could include USB-based press kits for tradeshows, or a manufacturer’s product catalogue mailed to clients.
Clone Your USB Drive
Simply download and extract Passmark Software’s free ImageUSB tool. The latest version 1.5.1000 released on October 25, 2019. This program doesn’t install into Windows 10, so make sure to unpack the ZIP file into a location you can remember.
After that, insert your source USB stick and launch the program by double-clicking on the ImageUSB.exe file. Tap on “Yes” if a User Account Control pop-up appears on the screen.
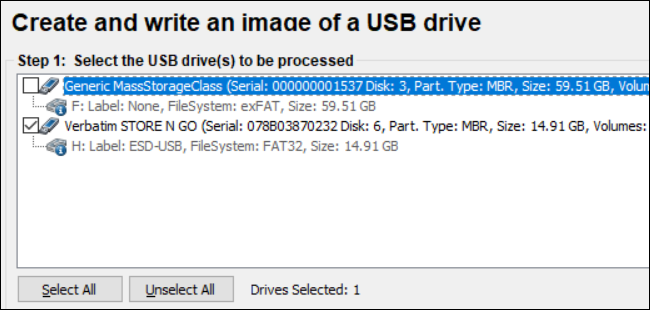
When the program opens on your screen kindly check the box next to your listed USB device.
After that, select “Create Image From USB Drive” in Step 2.
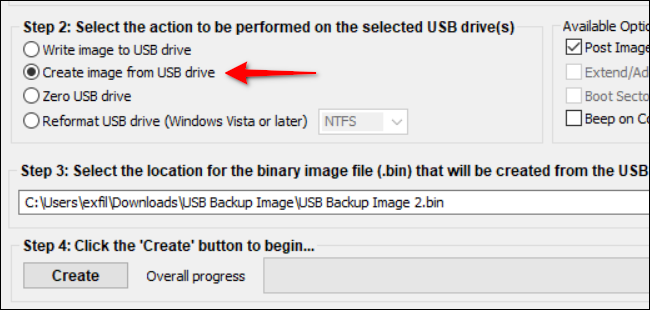
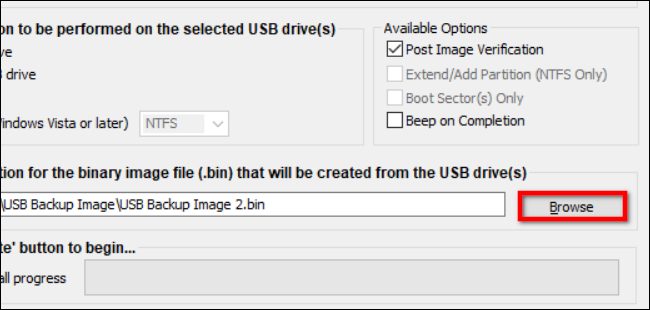
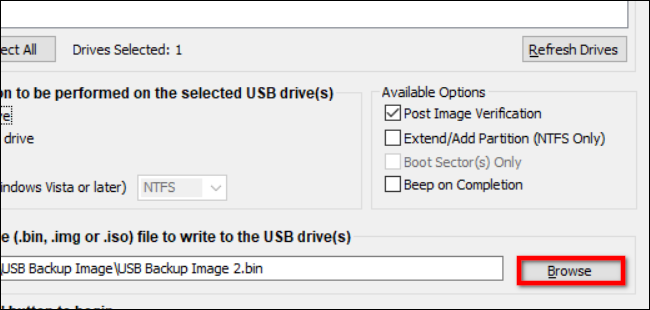
Tap on the “Browse” button to select or create a destination for the saved image. You will also need to create a file name, though you cannot change the “.BIN” file extension.
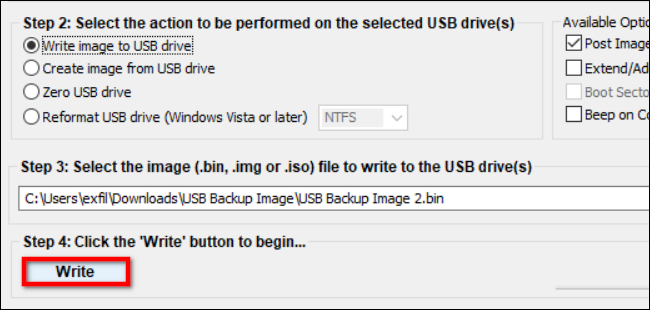
Now click on the “Create” button once you choose a file name and location to start the image-saving process.
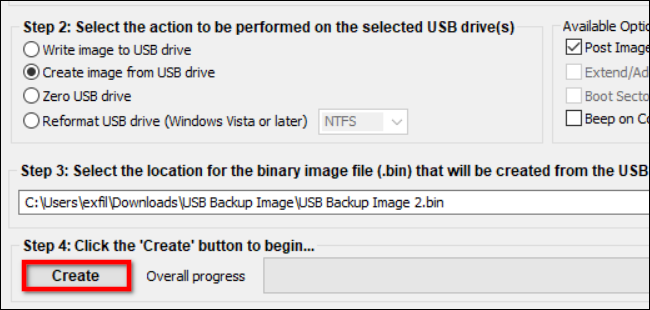
Finally, tap on “Yes” in the pop-up window to verify and confirm the task’s details.
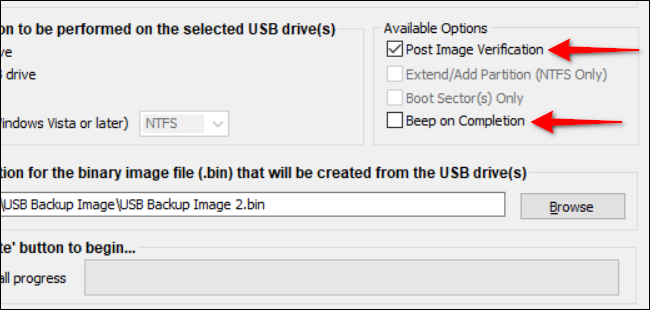
Under the “Available Options” section to the right, the “Post Image Verification” option is checked by default. With this feature enabled, the program scans through the file upon completion to verify its integrity.
If the file fails inspection, you’ll need to create the image again. You’ll also see a “Beep On Completion” setting that provides an audible alert.
Transfer Your Image File Back to a USB Stick
For this guide, you will need a USB drive with a capacity matching the original storage device. For example, if you created a USB image from a 128GB drive, then the second drive needs the matching 128GB capacity. You cannot install the image to a drive with a 64GB capacity, for example. Why? Because the image includes unused space.
As before, double-click the ImageUSB.exe file to launch the program. Click “Yes” if a User Account Control pop-up appears on the screen.
When the program opens on your screen, tap on the “Write Image To USB Drive” setting listed under Step 2.
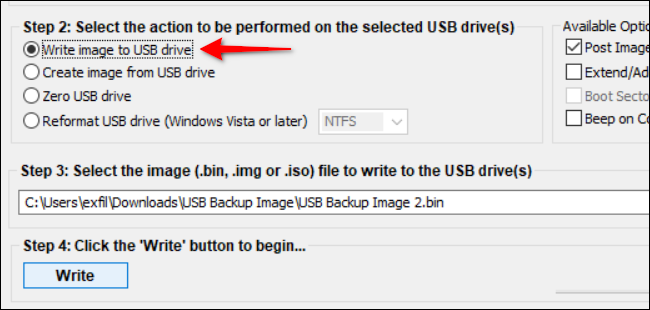
After this tap on the “Browse” button to locate and select the image file stored on your PC.
Once you locate the stored image, then tap on the “Write” button to begin. Just make sure that ImageUSB will erase everything stored on the destination USB stick and replace its contents with the image’s data.
When the process is complete, simply delete the file from your PC if you have no plans to write it to another USB stick. In case you are making multiple clones then simply insert a new USB drive and repeat these four steps.