The Secure Folder is a very useful feature on Samsung devices that allows you to keep apps and files out of sight. Here’s how to enable the Secure Folder on Samsung Phones.
How the Secure Folder Works
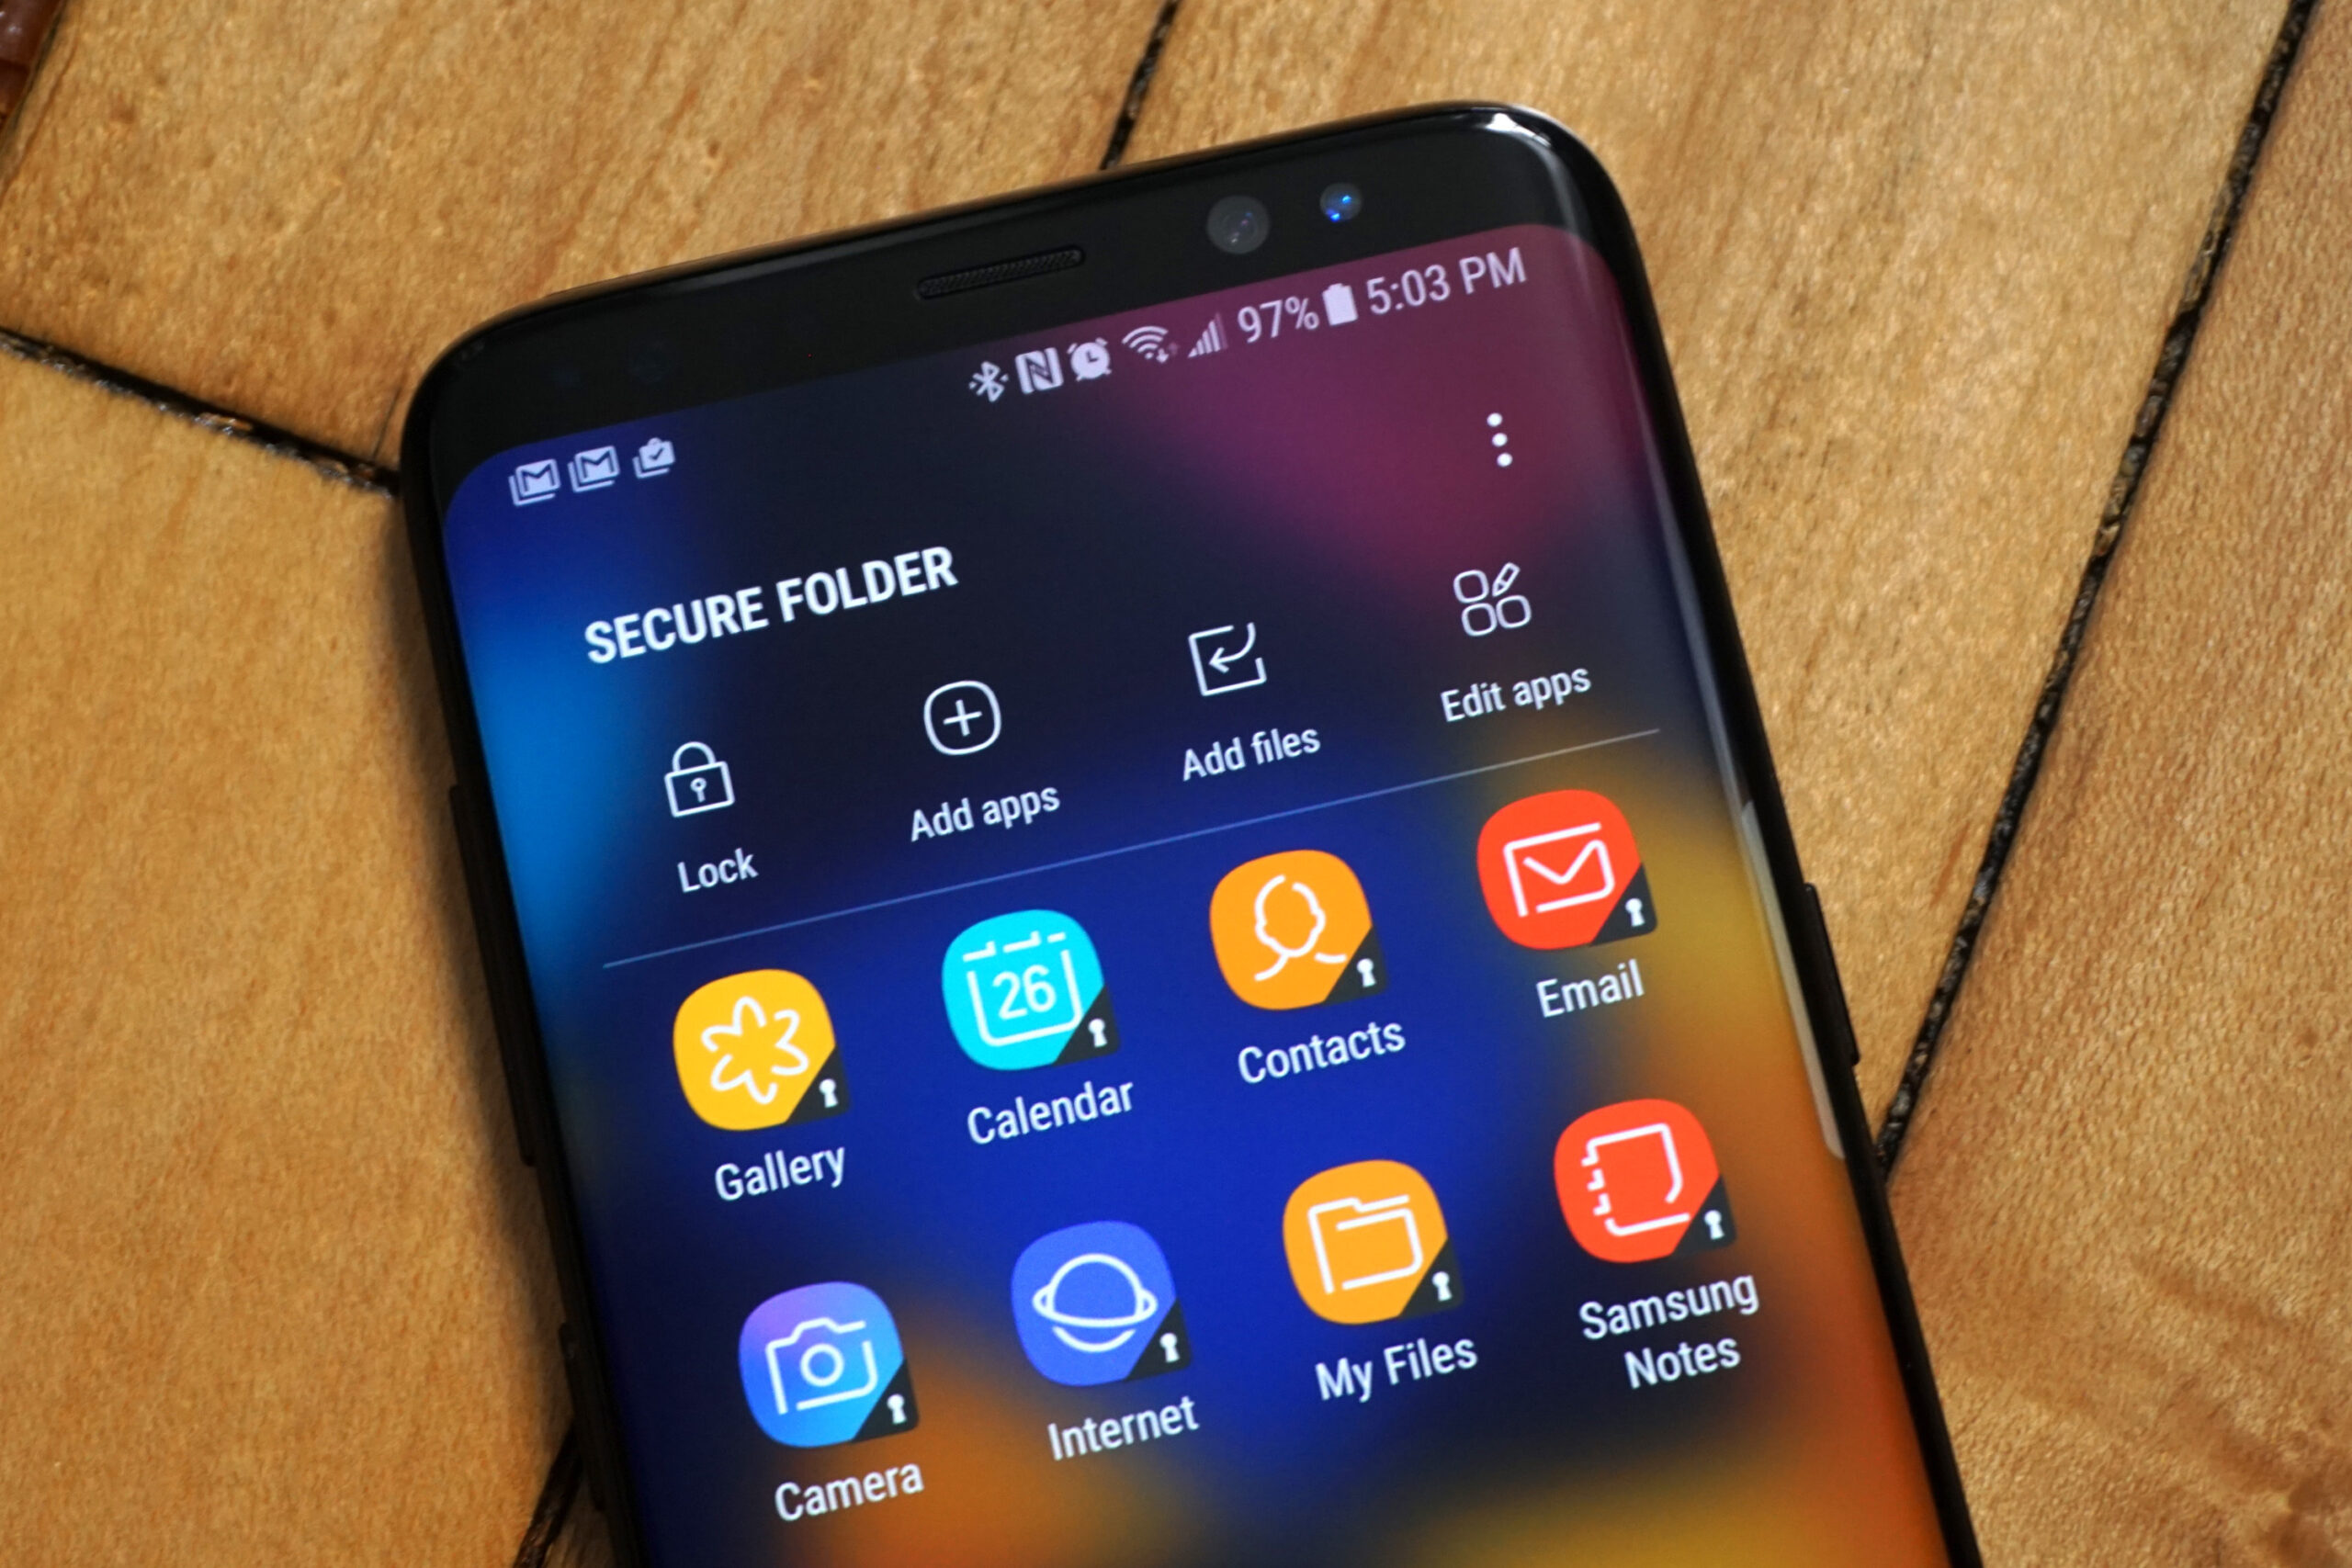
Samsung’s Secure Folder is an application that allows you to hide a part of your phone. It basically uses Samsung’s Knox security platform to create a new home screen that is protected by a password or your device’s biometrics.
Files and application you place in the secure folder can’t be accessed unless you unlock your Secure Folder. You can also add an existing app on your phone to your Secure Folder to create a copy of the app.
This app will not have any of your existing files, cache, and logins, so it is basically like a new installation of the app. You can also add new apps from the Galaxy Store or Play Store to install them only in the Secure Folder.
Files in your Secure Folder cannot be opened without authentication too. These files will not appear in regular file explorers or your Gallery app. Only apps that are already in the Secure Folder can access your hidden files.
Enabling the Secure Folder on Your Device
Before you try enabling the Secure Folder on your device, first check if your device is compatible or not. This feature works with Samsung Galaxy Knox-enabled phones running Android 7.0 Nougat and above versions.
The phones compatible with this feature are:
Galaxy S Series, starting from the S6 up to the S10
Galaxy Note Series, starting from the Note 8 up to the Note 10
Galaxy Fold
Galaxy A Series, including the A20, A50, A70, and A90
Galaxy Tab S Series, starting from the S3
Before you set up your Secure Folder, you first need a Samsung Account. Simply follow Samsung’s instructions for creating an account before proceeding.
On newer Galaxy phones, like the S10 and the Note 10, the app will come pre-installed. Kindly check your device’s app drawer to confirm if you have it installed. In case your phone doesn’t have the Secure Folder app then you can download it on the Play Store or the Galaxy Store.
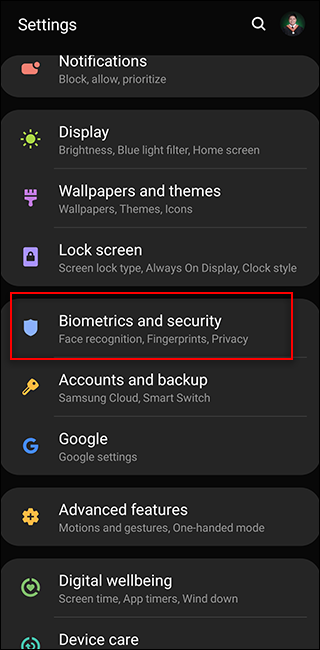
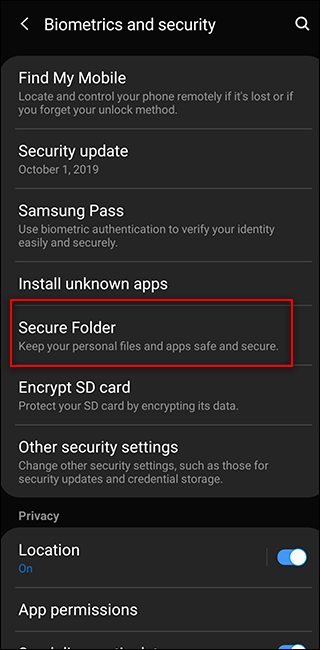
Now on your phone, go to the Settings app and then select Biometrics and Security > Secure Folder. On some phones, the first menu may be “Lock Screen and Security” or just “Security.”
It will then prompt you to log in to your Samsung account. If you haven’t already made one, make one now. Otherwise, log into your existing account.
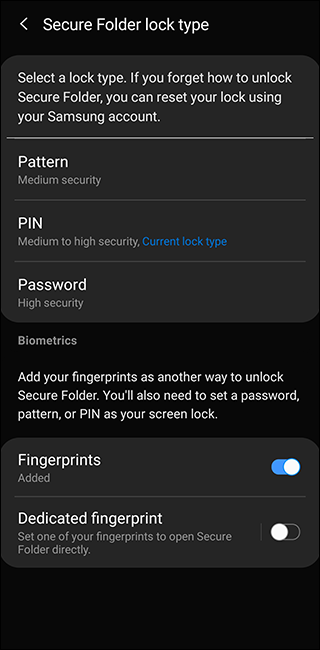
After that wait for the device to create your Secure Folder. This process may take a minute. Then, choose a lock screen type for your Secure Folder. Depending on your device, you can select a pattern, a PIN, or a password, and enable your device’s built-in fingerprint biometrics as well.
Your Secure Folder will be available for you to use just like any other Android app on your device. Search for the Secure Folder app shortcut on your phone’s home screen or in its app drawer.
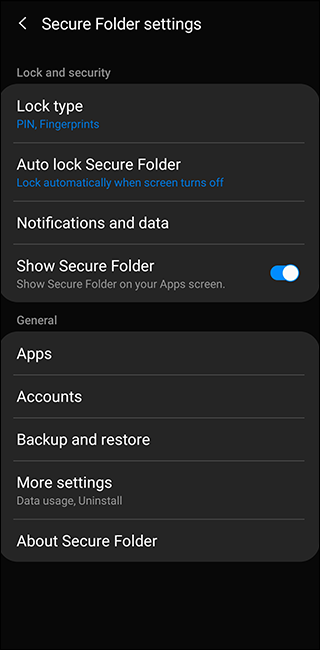
After your Secure Folder is activated then it’s a good idea to take a look through the settings. You can also access the settings by pressing the three-dotted button at the top right of the Secure Folder screen.
Now from here, you can manage your secured apps and edit the lock type, auto-lock settings, account settings, and notifications. You can also modify the appearance and name of the Secure Folder icon in your app drawer.
Adding Apps to the Secure Folder
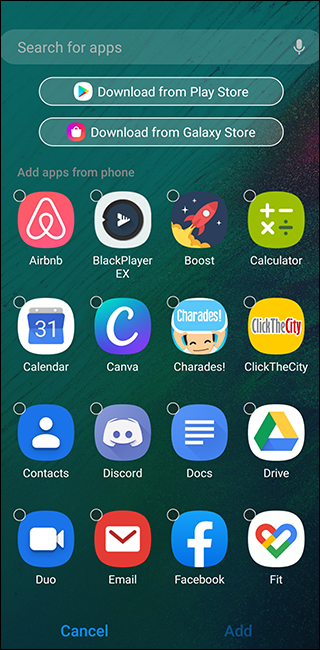
You can add applications to your Secure Folder. Ensuring the secured version of the app can’t be launched without unlocking the folder. To do this first, go to your Secure Folder and press the “Add Apps” button.
Now from here, you can either add an app already on your phone or install a new app from Google’s Play Store or Samsung’s Galaxy Store.
Adding an app that’s already on your phone essentially creates another copy of the app on your device with its own cache and stored files.
In case you duplicate a messaging app such as WhatsApp or Telegram then you can log in to a different account within your Secure Folder. These apps usually retain their history and cache even after you exit the Secure Folder.
The same thing also applies to web browsing. For example, if you install Chrome in the Secure Folder then you can still retain the history, logins, and bookmarks saved in the secured app, unlike Incognito Mode.
In case you add an app from the Galaxy Store or the Play Store, it becomes available only on your Secure Folder. It will not create a copy in your primary list of apps. This is useful for apps you do not want to be visible on the home page or while scrolling through your drawer.
Moving Files to the Secure Folder
In addition to apps, you can also move certain files from your phone to your secure folder. You can do these in two methods.
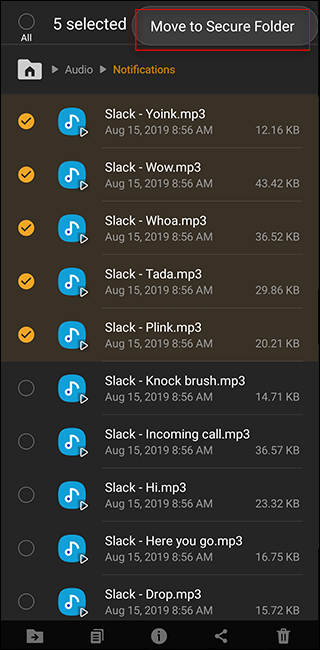
The first method is to go to your My Files app or Gallery app in your app drawer. Then select the desired files and folders using a long press. After that, press the three-dotted menu button at the top right and select “Move to Secure Folder.”
Here you’ll be prompted to verify your identity using your lock screen again, and then they’ll be moved. To access these files, use the My Files or Gallery app within the Secure Folder.
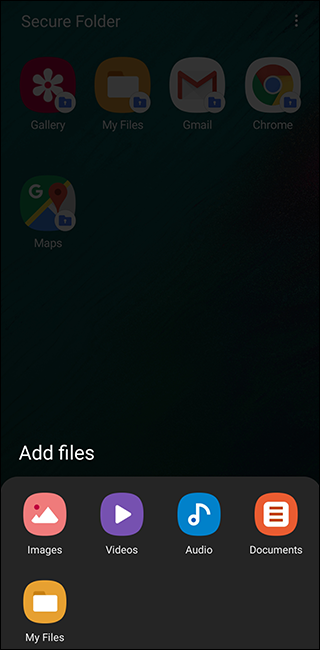
You can also go to your Secure Folder and tap on the “Add Files” button. From here, you can select either My Files, or the Images, Video, Audio, or Documents explorer. You can then choose one or more of the files, and press “Done” at the bottom of the screen to move them into the Secure Folder.
Kindly note that files downloaded within the Secure Folder, such as those from messaging apps or browsers, can only be accessed using apps in the folder.
You can move your files out of your Secure Folder in the same way only. First, go to My Files or Gallery in the Secure Folder, select the files, and press “Move out of Secure Folder.”