In this article, we are going to explain to you how to completely delete a file in Linux. Moreover, there is a way to entirely remove them from your computer, beyond recovery, without having to nuke your whole HDD.

The answer to this question is not only yes but also followed by more than one. Let us see some of the most popular solutions for complete file deletion in Linux.
Here’s how to Completely Delete a File in Linux
Ignore with SSDs
Most solid-state drives on the market present today on market support TRIM for managing their free space, a feature in their firmware that reallocates their contents.
Combined with the journaling file systems in Linux, such as Ext3/4 and Reiser FS, the deletion beyond recovery of individual files can’t be guaranteed. The only answer in those cases is, unfortunately, is a full nuke of all contents in an SSD.
Bypass the trash
In case you wish then you can bypass the trash folder. In this way, your deleted files won’t linger in the trash and will be marked fully gone. It won’t make their recovery impossible, however, it is a step up from having them accessible.
In order to do that in a distro like Kubuntu with KDE, run its default file manager, Dolphin. Tap on “Control -> Preferences -> Trash” to reach the related preferences.
There isn’t an option to fully disable the trash, however, you can use a neat trick that covers most bases: enable the Size limit and reduce it to the smallest value.
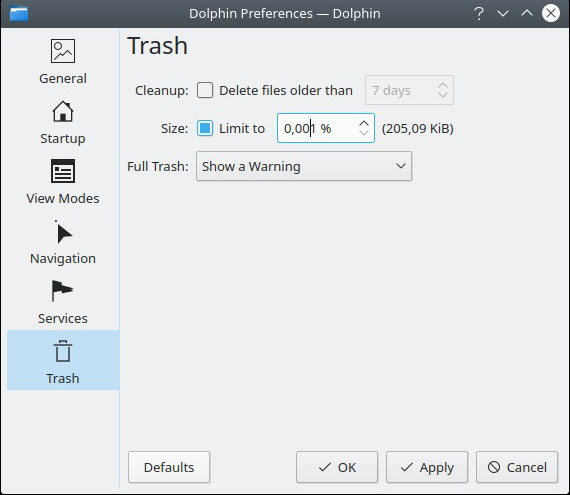
On our disk, this translated to 205.09 KB. Dolphin will erase the contents of the trash when they exceed that value, and that would probably happen every other hour with using a typical desktop.
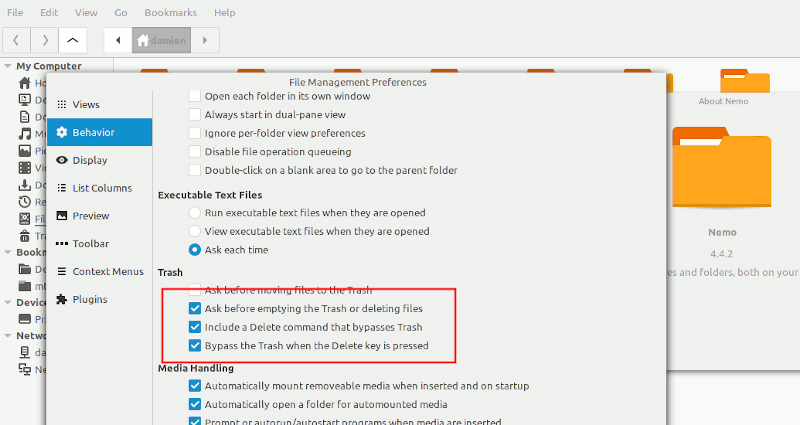
Other file managers such as Nautilus or Nemo have options for you to bypass the trash completely.
Using shred
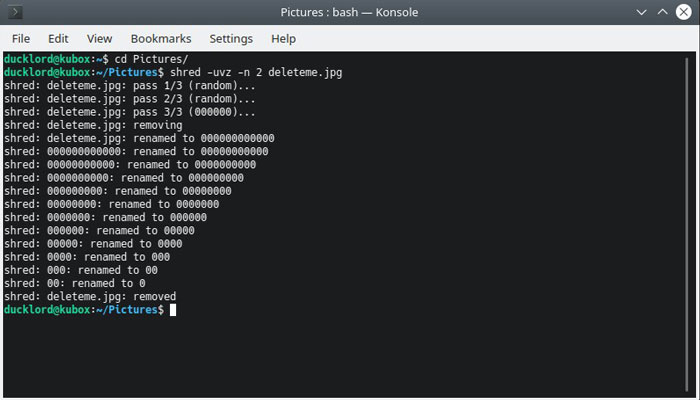
In case you’re running some variant of Ubuntu then shred is probably already a part of it. You can start using it immediately to fully erase any sensitive files that you want to send to oblivion.
Here’s how to do this:
If you wanted to obliterate “deleteme.jpg,” you could use:
shred -uvz -n 2 deleteme.jpg
From the options …
1. u tells shred to first remove the file before overwriting it.
2. v displays verbose information.
3. z fills the space that was taken by the data with zeros to further reduce any chance of recovery.
4. -n 2 translates to three deletion passes – shred does one pass by default, and with “-n,” you can specify how many additional passes you require over that for extra security. The general consensus is that three passes should be more than enough for most people.
In order to eliminate multiple files or the contents of a folder, you can use wildcards like:
shred -uvz -n 1 Pictures/delete_those_images_0?.jpg
shred -uvz -n 4 Pictures/*.*
In the first case, “?” would be a wildcard for a single character, and shred would delete files named “delete_those_images_01.jpg” and “delete_those_images_02.jpg,” for example.
In the second case, shred would wipe out all files in the directory Pictures, no matter their name or type.
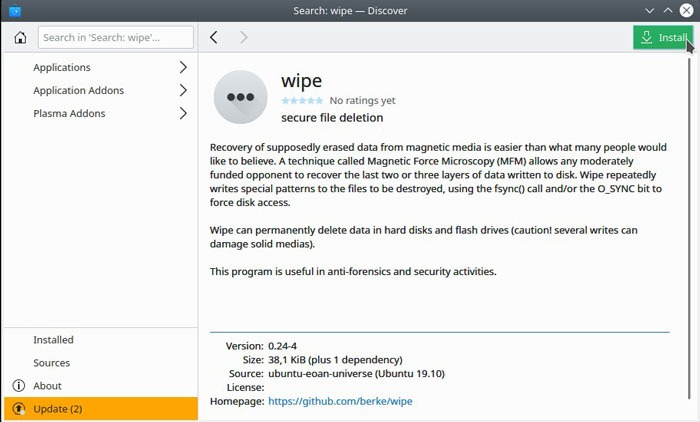
Using wipe
Wipe is just another excellent alternative. Search for it in the software centre of your distribution and install it from there.
Its use is almost as simple as shred. To erase any file or directory or use wipe, just use:
sudo apt install wipe
Its use is almost as simple as shred’s, if not simpler. To erase any file or directory or use wipe, use:
wipe Pictures/deleteme.jpg
This can become sometimes annoying since, by default, wipe uses too many time-consuming passes for extra security. Furthermore, it will request confirmation for the deletion.
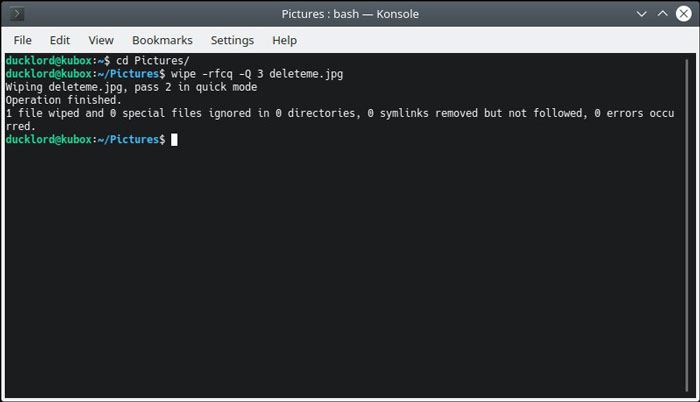
Simply use the f flag to get rid of the confirmation and r to recurse into subdirectories. c tells wipe to chmod if necessary when a file or directory has no write permissions set, and q allows you to reduce the number of passes for a quicker deletion.
While using q, notice that it’s lowercase. It can be followed by a capital “Q” specifying the number of passes you require. For example, the previously simple command, with those tweaks applied, would change to:
wipe -rfcq -Q 3 Pictures/deleteme.jpg
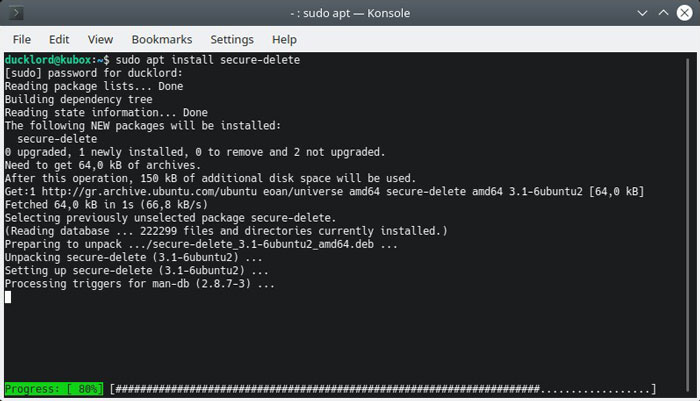
Using Secure Delete
SRM is one of the best tools in the Secure Delete suite of tools that specializes in secure removal of data from your HDD. It’s held by many as the best tool for this job too.
To install the full Secure Delete suite on Ubuntu and compatible distributions, simply use:
sudo apt install secure-delete
Afterwards, you’ll be able to annihilate any file with:
srm Pictures/deleteme.jpg
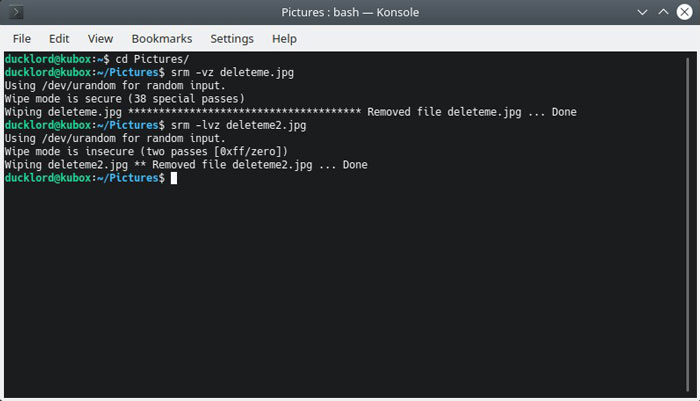
You’ll probably wish to use the z flag, that overwrites your file’s contents with zeros for extra security and v to get verbose information about the process. If dealing with directories and subdirectories, also include the r flag for recursive mode.
In case the 38 rewrites are too much for you then you can decrease the time required – as well as the security – by utilizing the l flag to reduce the number of passes to “only” two. This would turn the previous command to:
srm -rlvz Pictures/deleteme.jpg
The GUI way: using Bleachbit
In case you have an aversion to the command line then Bleachbit is one of the best solutions for securely erasing your data. By default, the tool specializes in discovering and disposing of “redundant files” that takes up space long after you’ve needed them.
However, it also incorporates the usually forgotten ability to manually “shred” any file beyond recovery.
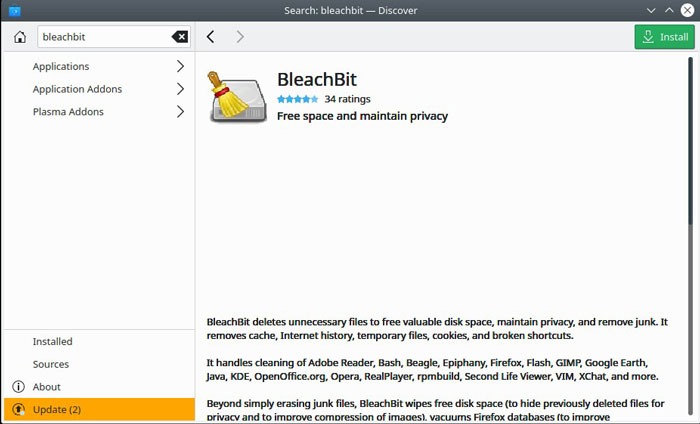
You can install it on your Ubuntu-compatible distribution through its software centre or by using:
sudo apt install bleachbit
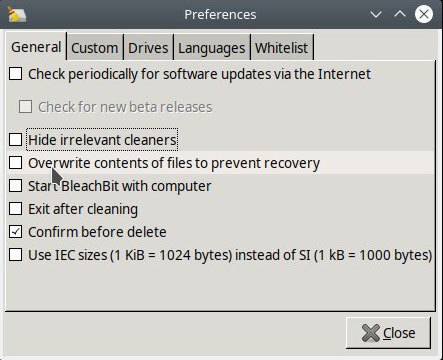
Tap on “Edit -> Preferences” and enable the option “Overwrite contents of files to prevent recovery” for enhanced security.
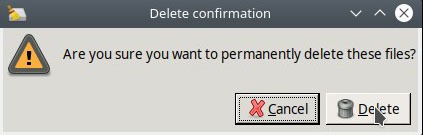
Now go back to its main interface, click on “File -> Shred,” and from the requester that pops up, choose the files you wish to beam to nothingness.
Tap on “Delete” and re-assure Bleachbit that you’re sure of what you’re trying to do.
Always kindly keep in mind that our use of journaling file systems, and the fact we don’t know how each HDD’s firmware “manages,” for lack of a better term, its contents, means that the best solution is wiping out the full HDD – or even better, physically destroying the device.