Do you also have an unusable USB stick like many others? It has definitely stopped working for some reason and you will probably find it is no longer of any use. Here’s how to fix an Unformattable and Unusable USB Drive.
There could be one of the following scenarios with you – either the memory has been used up completely even though there are no files or Windows just won’t let you format the drive. Or else in the worst-case scenario, the USB drive name refuses to show up on your computer.
If any of this sounds familiar to you then, you should know it may not be entirely the USB drive’s fault. There are many reasons behind you experiencing these errors. Sometimes there are partition errors which also suck up the storage space.
Follow the detailed steps given below in this guide to fix an unformattable and unusable USB drive. The main objective is to permanently wipe the old data and gift yourself a new USB drive.
Kindly Note: the following steps are done on a Windows computer.
Here’s How to fix an Unformattable and Unusable USB Drive
1. Detect a Corrupted Drive
In case your computer is still able to detect your USB drive then you might want to know if it’s been corrupted. Simply select the “Properties” of the drive folder and check the device status. If it says “This device is working properly,” then this USB drive is definitely worth saving.

There is no need to worry in case you can’t see the USB drive folder. Now pay attention to the next few steps as they will help you make the drive usable again.
2. Wipe the USB Drive Clean with Diskpart Command Line Tool
Windows usually come with a built-in format disk option to erase everything from a USB flash drive. This is accessible from a simple right-click, however, at this stage, it probably won’t work anymore.
If you no longer need the data in the removable media then the command-line tool is a better way to help you get to the root of the problem and fix the storage space issues once and for all.
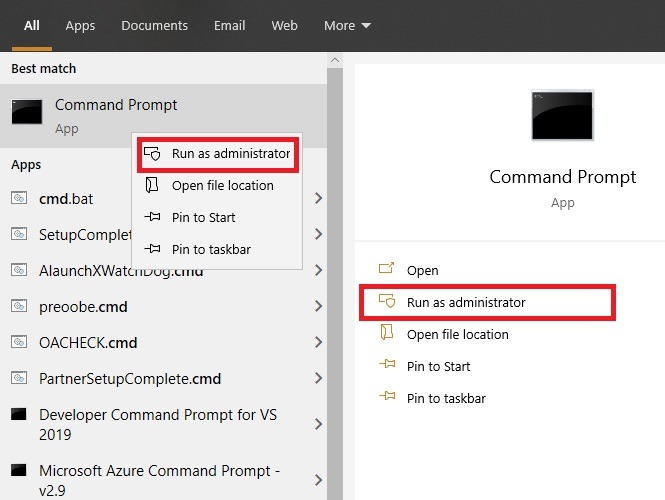
Now on Windows 10, go to the search button and run the command prompt as an administrator.
Ensure the USB drive has been inserted already. As soon as it starts just enter diskpart as shown here. It will soon load a program known as “Diskpart,” which is basically Microsoft’s disk-partitioning utility. It also allows you to view, create, delete or modify any disk.
Then next to “Diskpart,” enter list disk. This will provide a list of each and every disk that is connected to your computer. Here you can easily identify your USB drive by its given size.
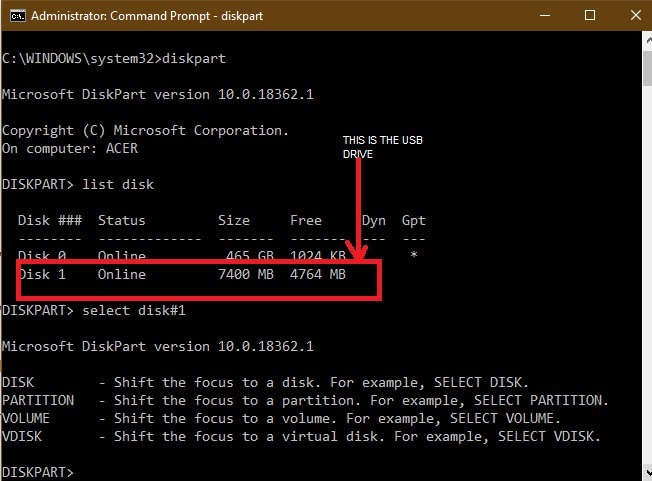
After this, enter select disk# and instead of #, you have to insert the numerical value of the removable drive as shown in the below screen. Then very soon you should see a success status message, “Disk# is now the selected disk.”
Warning: do not accidentally select your computer’s hard drive number – in this case, it was “0.” You definitely will regret it.
Now to wipe your removable media clean, enter clean. This will simply empty the contents of the USB drive completely. You can again check for freed space using list disk option. Now the USB drive is ready for any further modifications.

3. Reallocate the USB Drive Volume from Disk Management Console
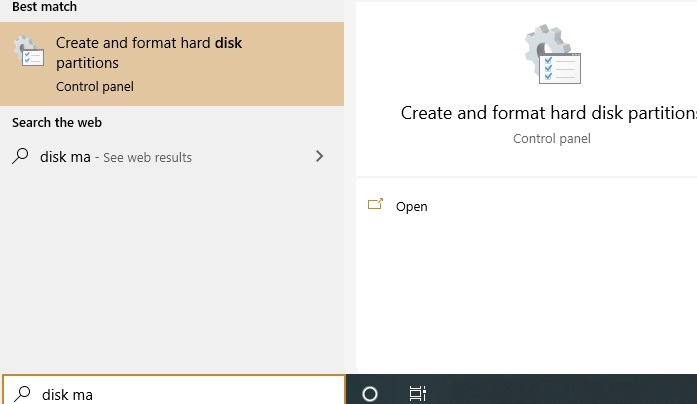
Even after you wipe your USB drive clean, your computer is not able to view it. Therefore, we will need to open the Disk Management Console and it is easily accessible from the search menu. You can also type “diskmgmt.msc.”
As soon as the console window opens, then you can see the disk number for your USB drive. Just right-click on it and select “create simple volume.” Then it will lead to a “new simple volume wizard” pop-up window.
In case your USB drive was identifiable on your computer then you won’t ever see this option. Instead, you will be able to directly format the disk from this menu only. There is a reason we had to earlier run “Diskpart” in the command prompt.

Once you tap next, you can specify the volume size for the pen drive. Just select the maximum volume, which is shown as a default unit in MB.

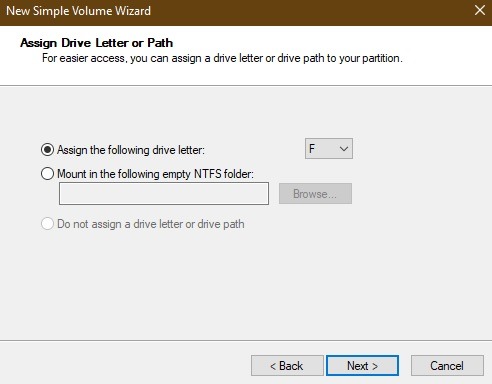
As soon as you see the next step, choose “assign a drive letter,” which will help you view your pen drive once again. We chose “F” as shown here.
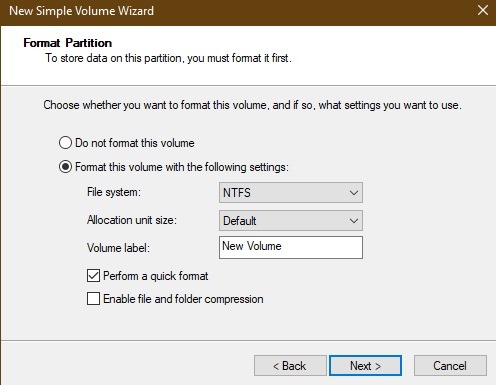
Then format the partition in the next step. This may be just an extra step because you have already wiped out the data clean. However, it is always better to be sure.
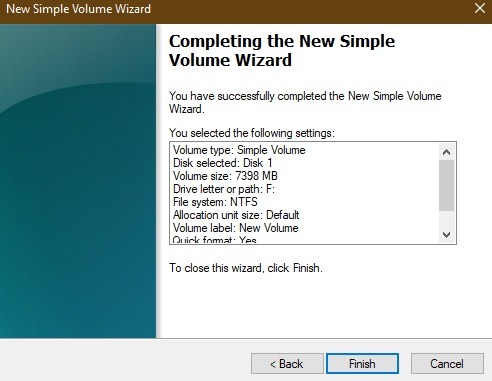
Now tap “Finish” to complete the new simple volume wizard which will now be allocated to the USB drive.
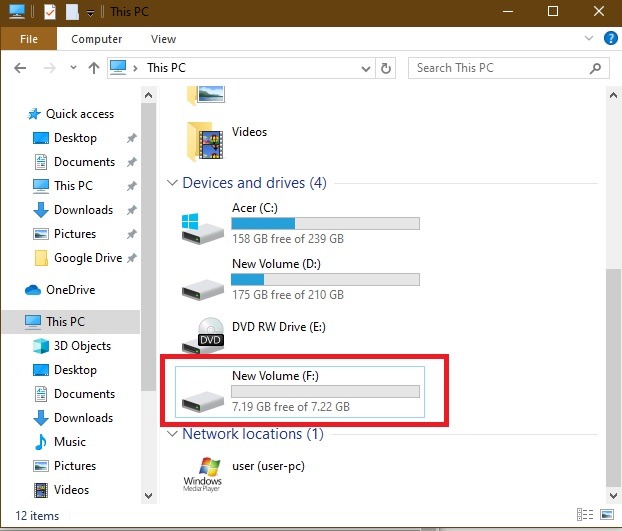
After you reallocate the unallocated USB drive space then you will be able to view the USB drive storage once again.
4. Use Partition Wizard to Keep Your USB Drive in Mint Condition
Although you can now use the removable media once again, you will definitely need a third-party tool to keep the USB drive working and optimize the disk storage space.
For this reason, there is a good freemium tool called “Partition Wizard.” It can help you to align SSD partitions, clone disks, and much more.
Just download and install the software. It might prompt you to install third-party anti-virus software, which you can uncheck as you will be not needing it.
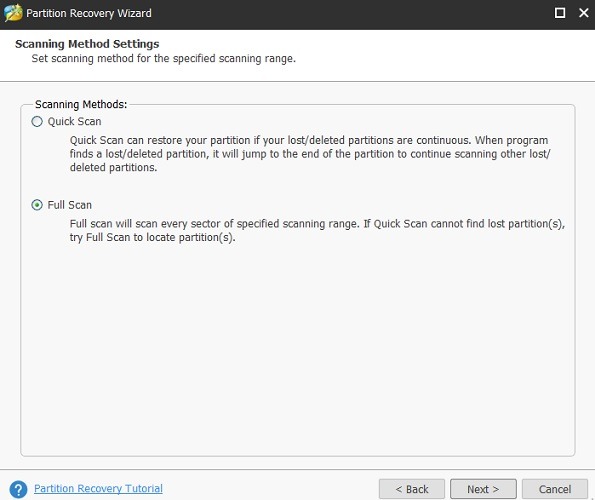
Then you can view the removable media drive. Now go for a full scan to identify any potential corrupt areas.
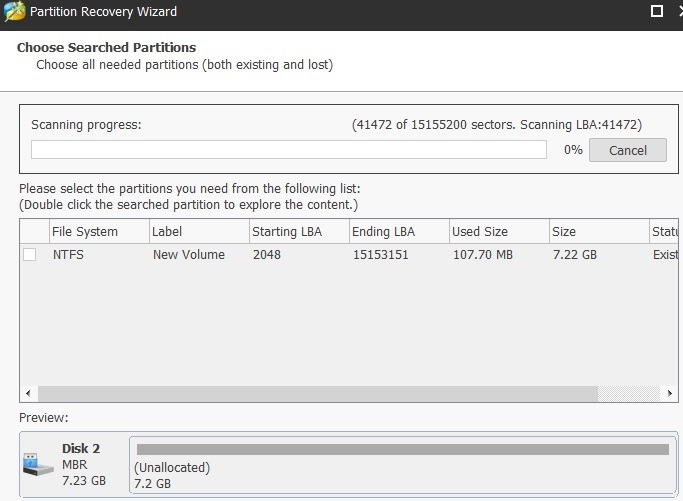
The scanning will surely restore your USB drive to its full available space. Once done, you can simply start using it just like when it was in mint condition.
Conclusion
In case we ever find our USB drives usable and unformattable, our first impulse is to throw them right away. However, there is still so much data, you can carry on it as long as it has not been corrupted.
Therefore, it is better to diagnose the problem first and find out whether your pen drive is still recoverable. If yes, then you may be able to start using it once again as if nothing happened.