User Access Control (UAC) prompts in Windows 10 can be sometimes annoying, especially when you often run a program that requires Administrator permissions. However, there’s a way to create a shortcut that doesn’t prompt you for UAC. Here’s how to create Administrator Mode Shortcuts.
Create Administrator Mode Shortcuts Without UAC Prompts
This trick generally works by setting up a scheduled task to run the target application in Administrator mode for you. After that, you can create a desktop shortcut that tells the task to run, which will bypass the UAC prompt the next time you tap on the shortcut.
Whereas you can technically disable UAC prompts altogether, that is an inherently bad idea as it opens up your computer’s security to potential threats and malicious code.
Because running Task Scheduler requires you to tap through a UAC prompt that gives Administrator privileges to set up a task, this trick is not really a security loophole.
How to Create a Scheduled Task
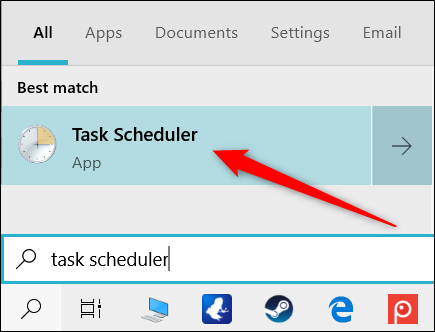
To launch the Task Scheduler first, tap on Start, type Task Scheduler into the search bar. Then select the Task Scheduler icon in the search results.
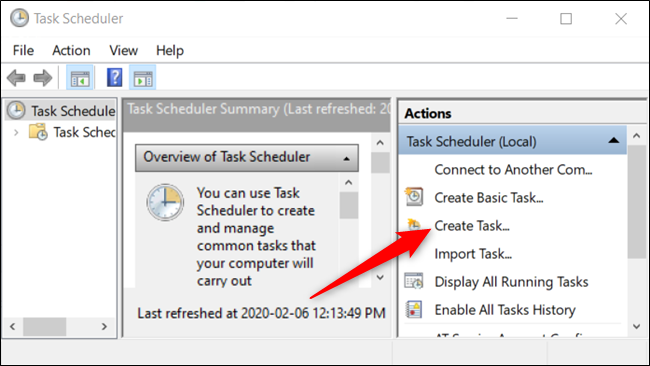
When Task Scheduler opens, tap on “Create Task” from the pane on the right side of the window.
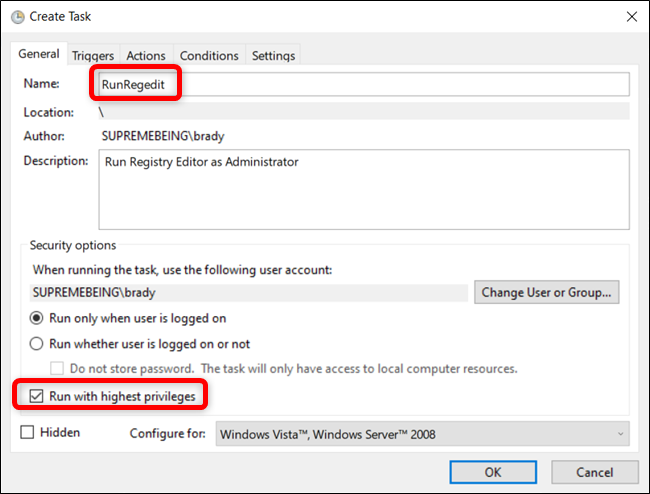
Now give the task a simple name, preferably without any spaces. Because that is easy to remember and then tick the box next to “Run with Highest Privileges.” You can also give it a brief description if you want, however it is not necessary.
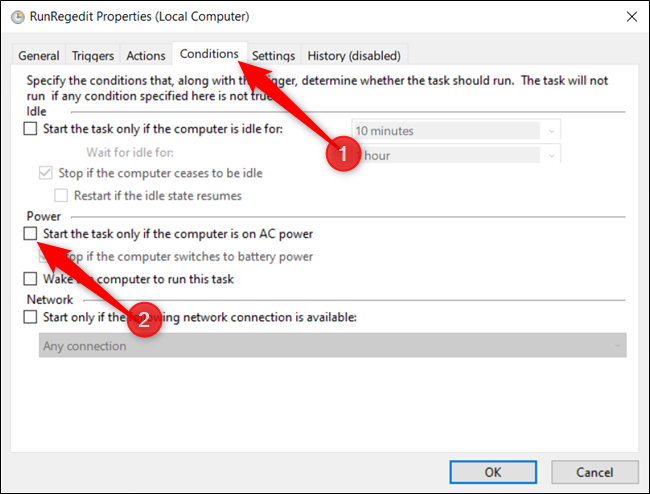
By default, in case you are setting up this task on a laptop then, Task Scheduler won’t run the task unless your computer is connected to AC power.
If you don’t disable this option then, when you tap on the shortcut, the task won’t initiate the program and stick in a “Queued” state until you plug in the AC power.
Tap on the “Conditions” tab and untick the box next to “Start the Task Only If the Computer Is on AC Power.”
Then, switch to the “Actions” tab and then tap on the “New” button to create a new action for the task.
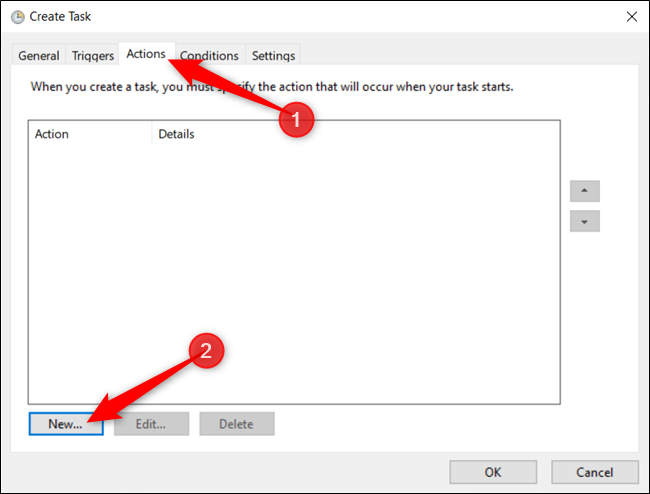
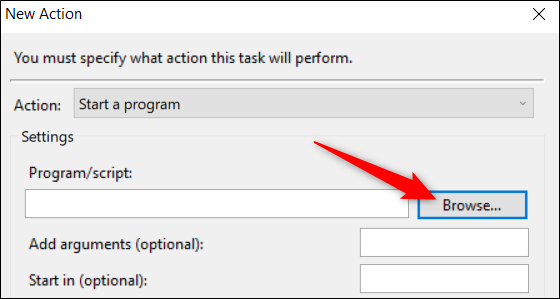
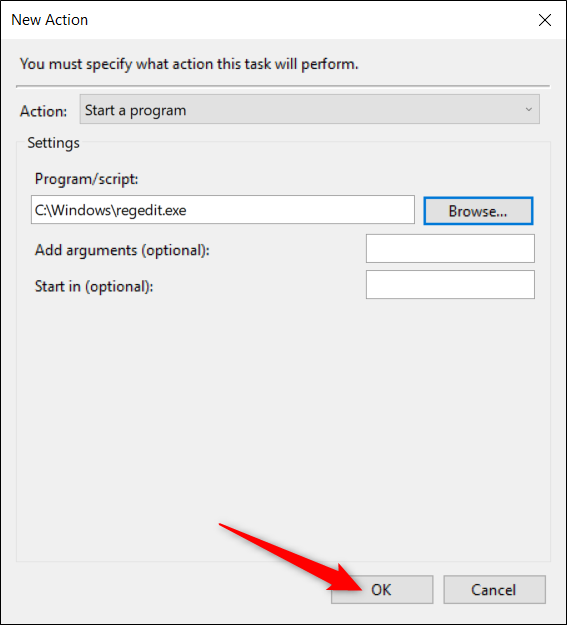
Now, tap on the “Browse” to search for the application to run when you start the task.
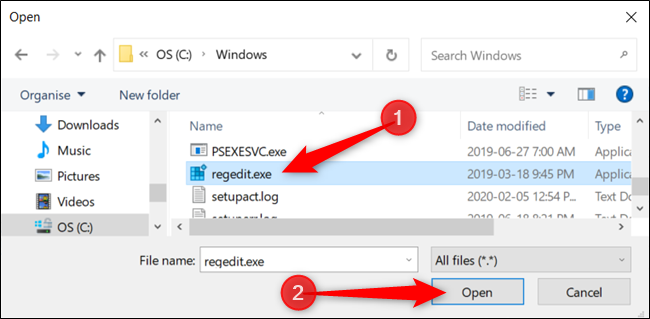
Next, locate the application you want to start and then tap on “Open” after selecting it in File Explorer.
Tap on “OK” to save the changes.
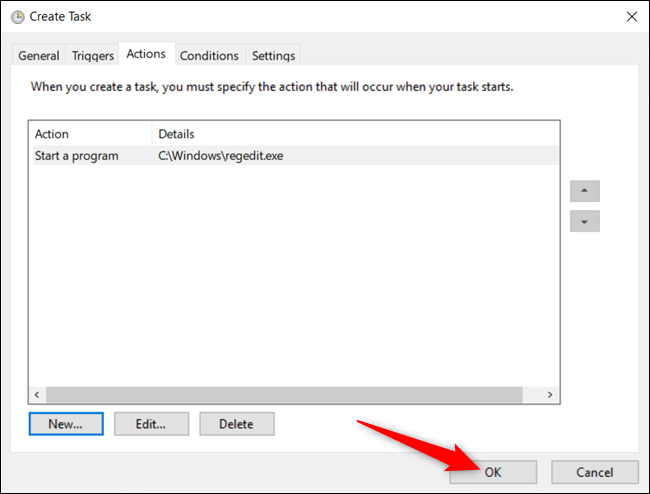
Now click “OK” one more time to finish the task creation process.
After you create the task, that’s all you need to do for this part. In case you want to make sure the task runs as expected then, select the “Task Scheduler Library,” right-click on the task in the list. After that, tap on “Run” from the context menu.
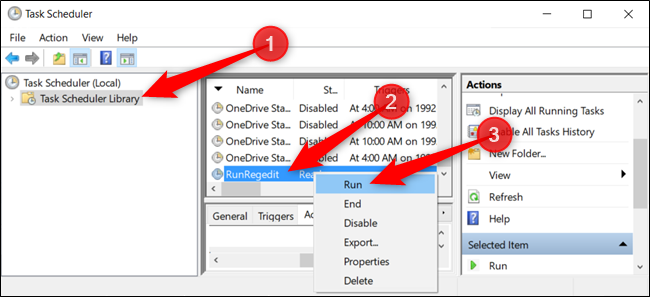
Once all systems go then, close Task Scheduler, taking note of the name you used for the task.
How to Create the Shortcut to Start the Task
Now after you have successfully made the task that will open the application, it’s time to create a shortcut that will run the task.
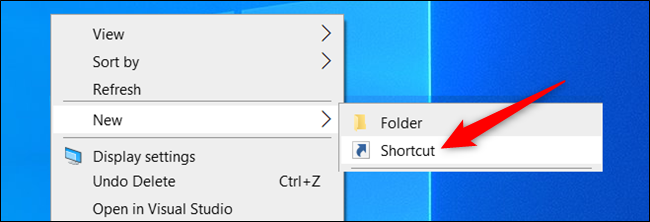
Next, right-click an empty spot on the Desktop and then select New > Shortcut from the context menu.
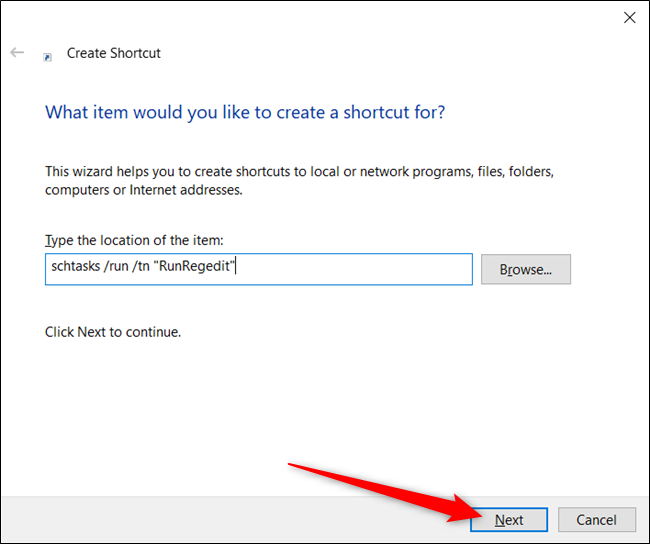
Then in the window that appears, we need to type in the command that runs the scheduled task, replacing <taskName> with the task name we used from earlier. Make sure to keep the quotations around the name. It should look like this:
schtasks /run /tn "<taskName>"
Tap on “Next” after you enter the command.
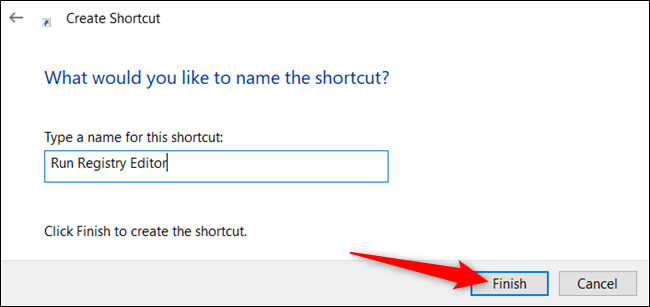
Now give the new shortcut a useful name and tap on “Finish” to create it.
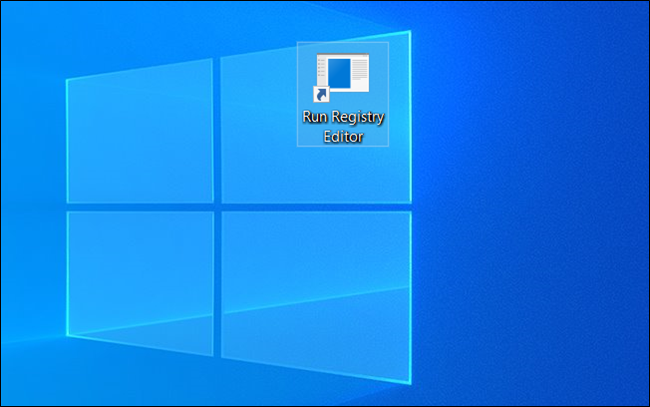
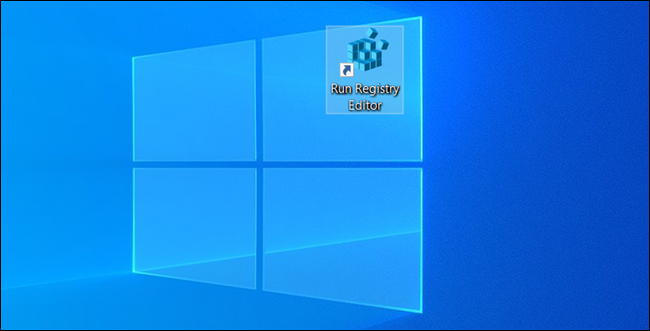
The desktop has a shortcut icon that will run the task that launches the application in Administrator mode, without a UAC prompt when you double-click on it.
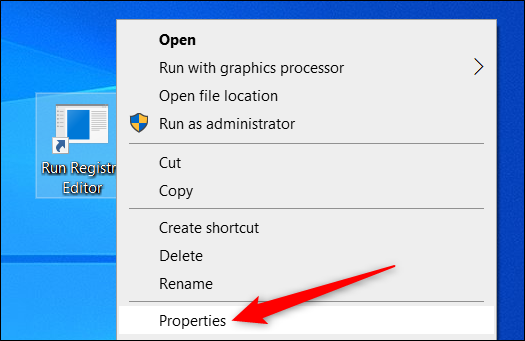
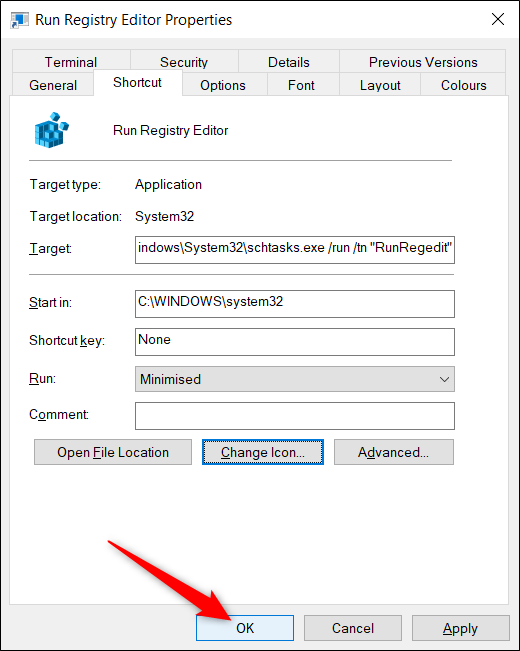
However, the fun does not end here. In case you want to tweak it a bit more then, right-click the shortcut and then select “Properties” from the context menu.
Because the shortcut runs a command to start the task, Command Prompt will open for an instance, run the schtasks command.
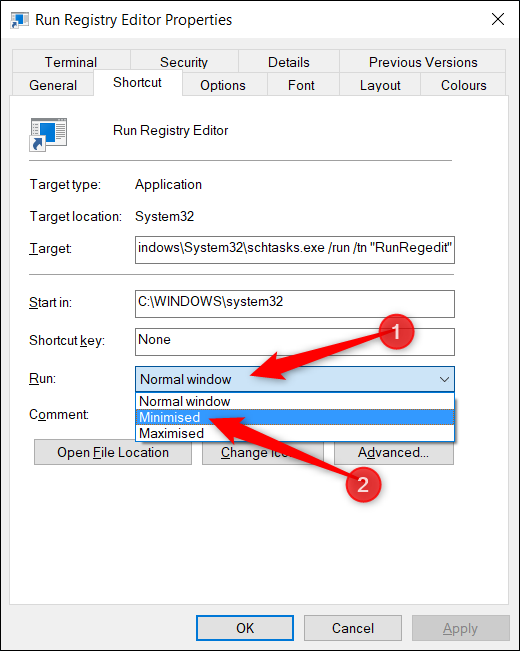
Then close before the application opens. In case you want, you can set it to minimize when you open the shortcut, so Command Prompt doesn’t flash on the screen.
Tap on the drop-down menu next to “Run” and choose “Minimized” from the list below.
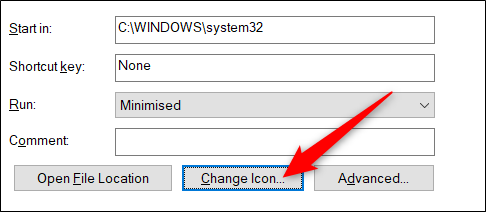
After that, tap on “Change Icon” to personalize the shortcut’s icon.
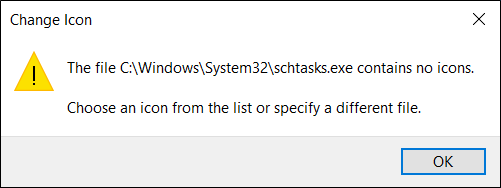
In case you receive this message then, don’t worry, just tap on “OK” to continue.
Now, you can either scroll through the suggested icons or tap on Browse. Then locate the application that you’re opening with the task. Then select “Open” to see its icons.
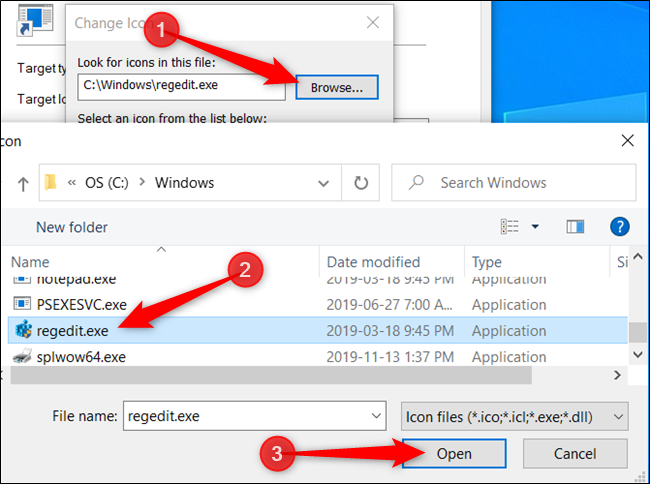
Just select the application’s icon and tap on “OK” to save the changes.
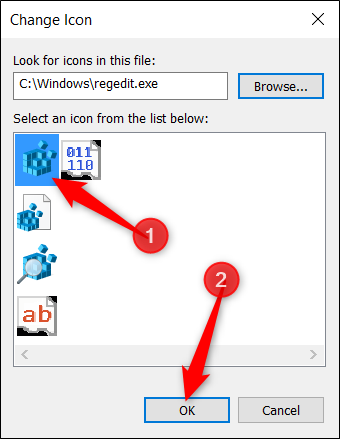
Then select “OK” one more time to save all changes and return to the desktop.
Now you have a shortcut that looks nice, even resembling the application you’re opening. Also, doesn’t have a pesky UAC prompt to get in your way.
That’s all there to do. Repeat this process for any other applications you regularly use to bypass the UAC prompts.